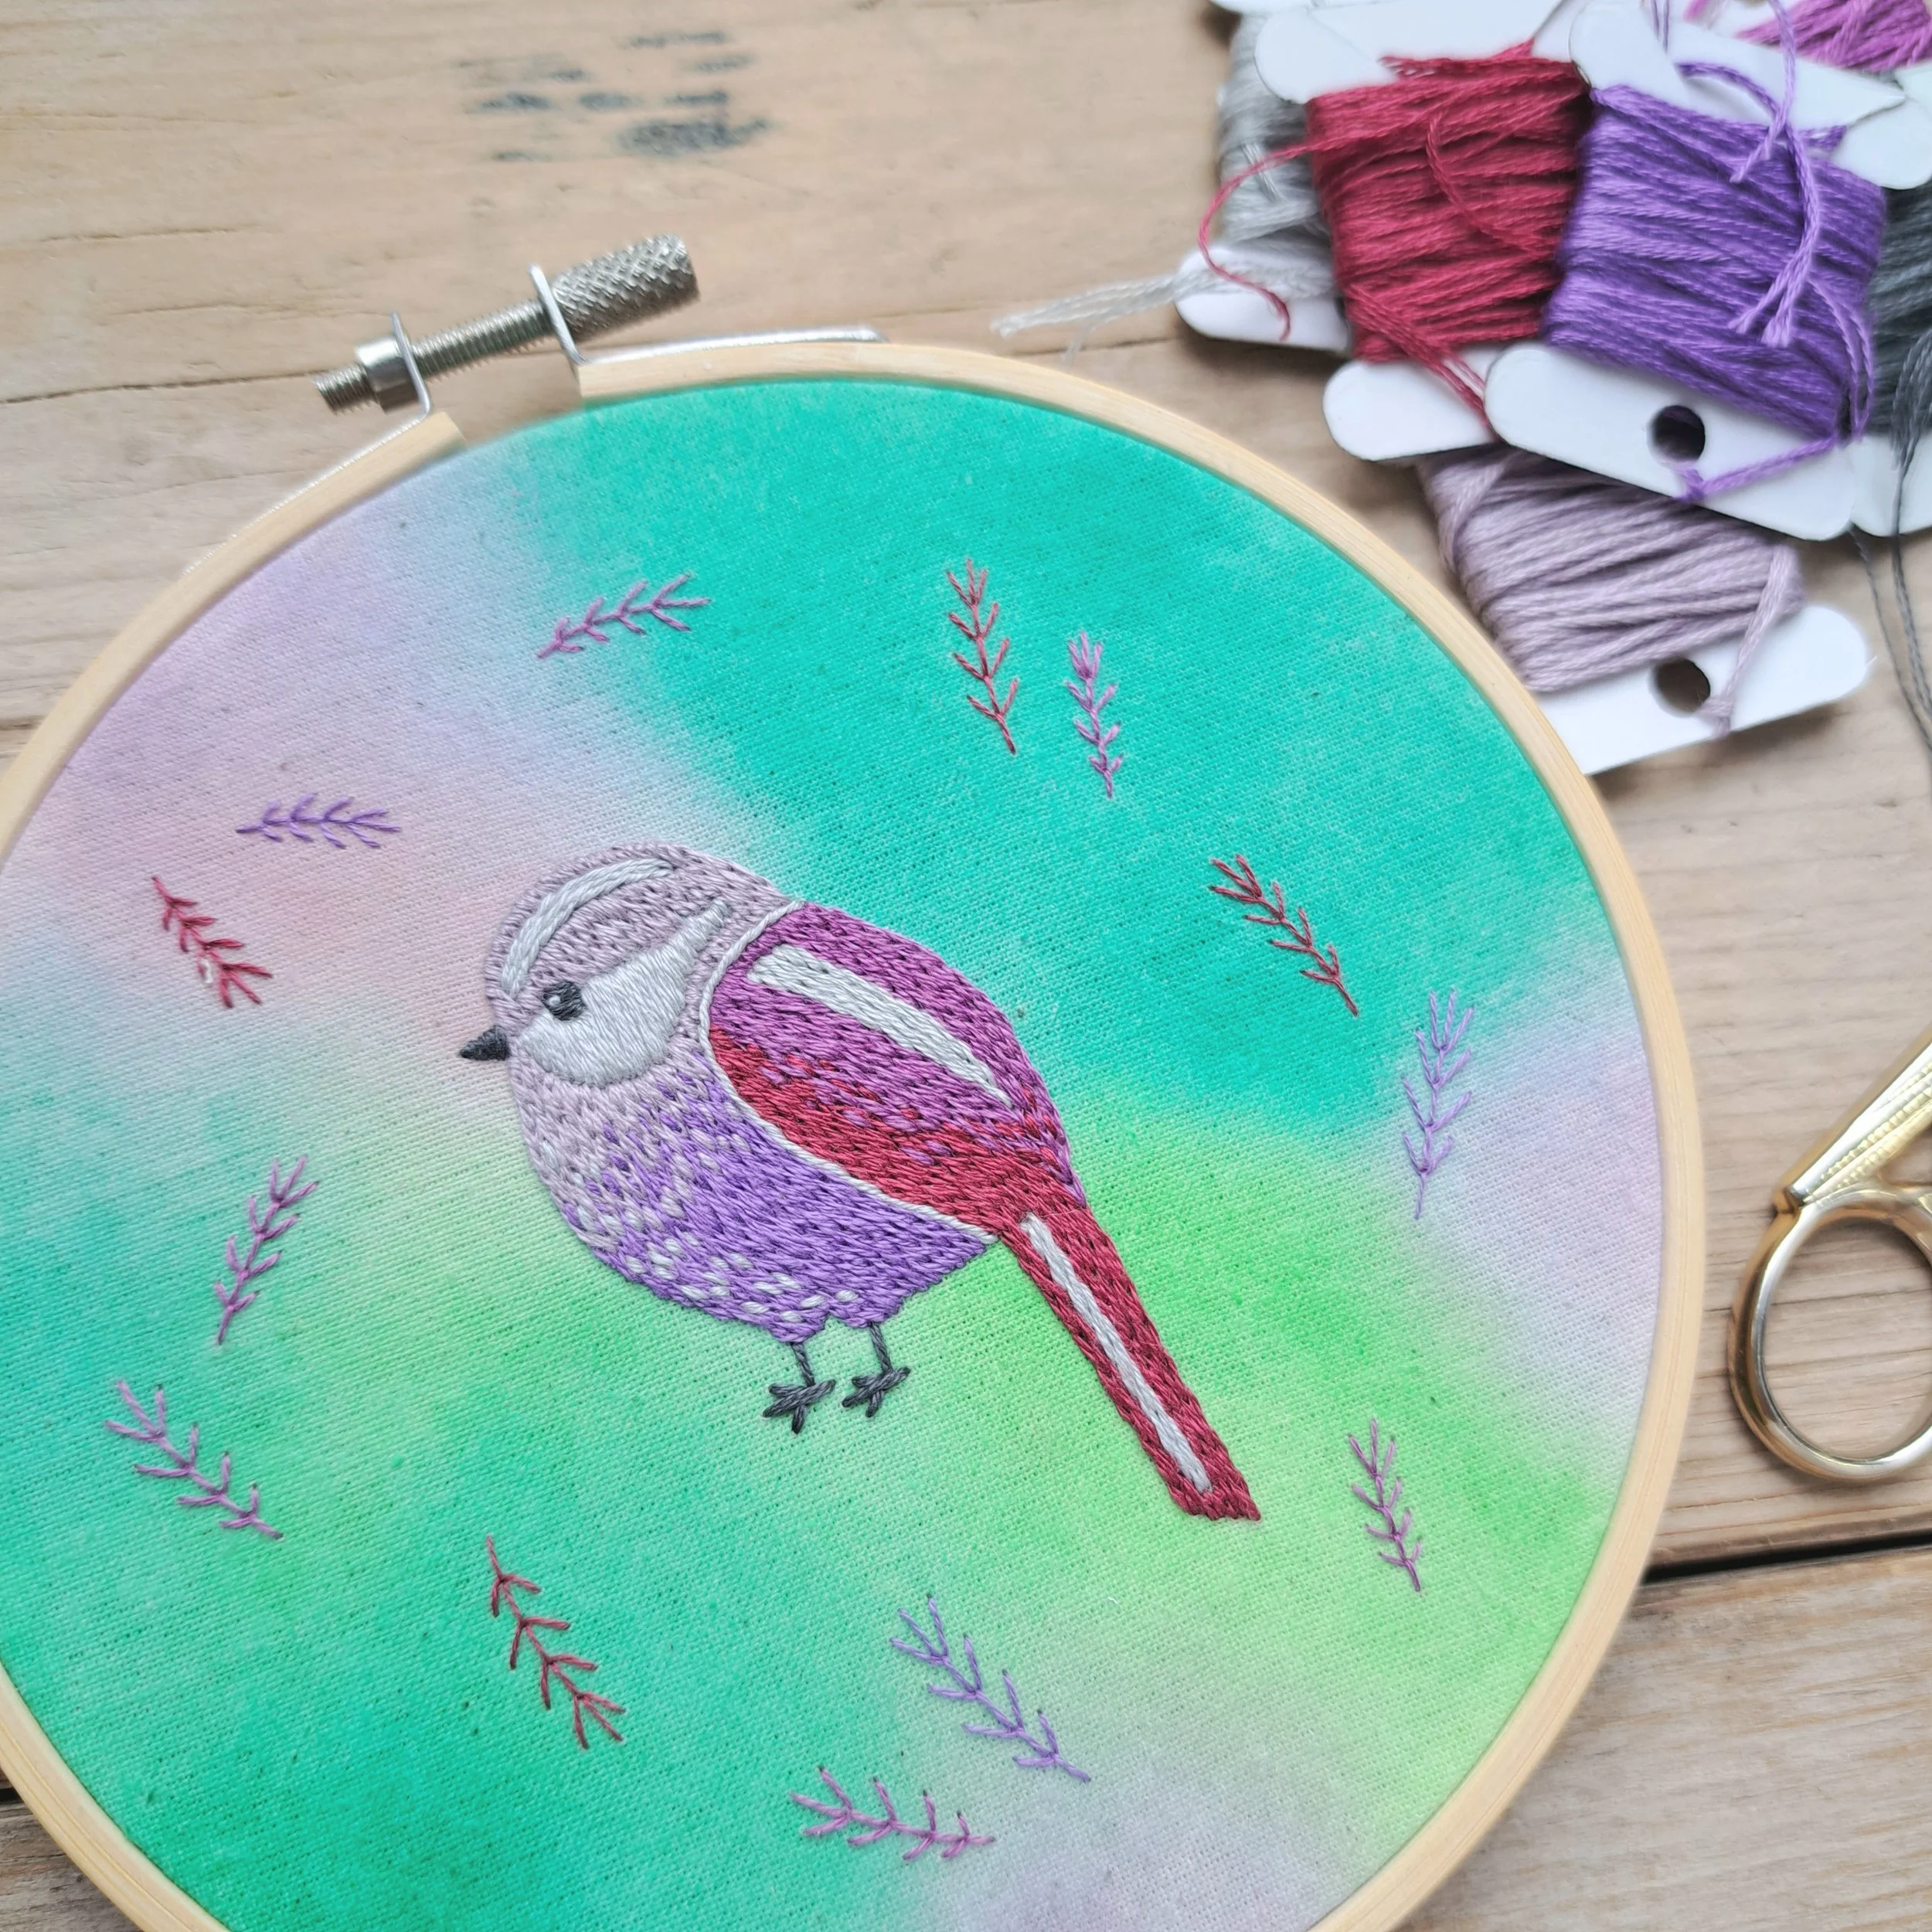
Long Tailed Tit Embroidery
Oooo I’ve really added a whole new level of fun with this embroidery project. It’s the first of my new garden bird designs that I’ve stitched and yes, I’ve painted the background! Now that I’ve finished this adorable Long Tailed Tit embroidery, I’ll walk you through how I did it. I’ll tell you what you need, how I created the fun vibrant background and how I stitched it including the thread colours, the stitches, the number of strands and the needle size that I’ve used.
Just a quick note: Since stitching this Long Tail Tit, I’ve updated my embroidery panels. While the new panels are no longer hand-printed, the bird remains the same (just the outline). You can still use this blog as a guide for stitching it, and the links now direct to the updated version of the design.
1. What you need
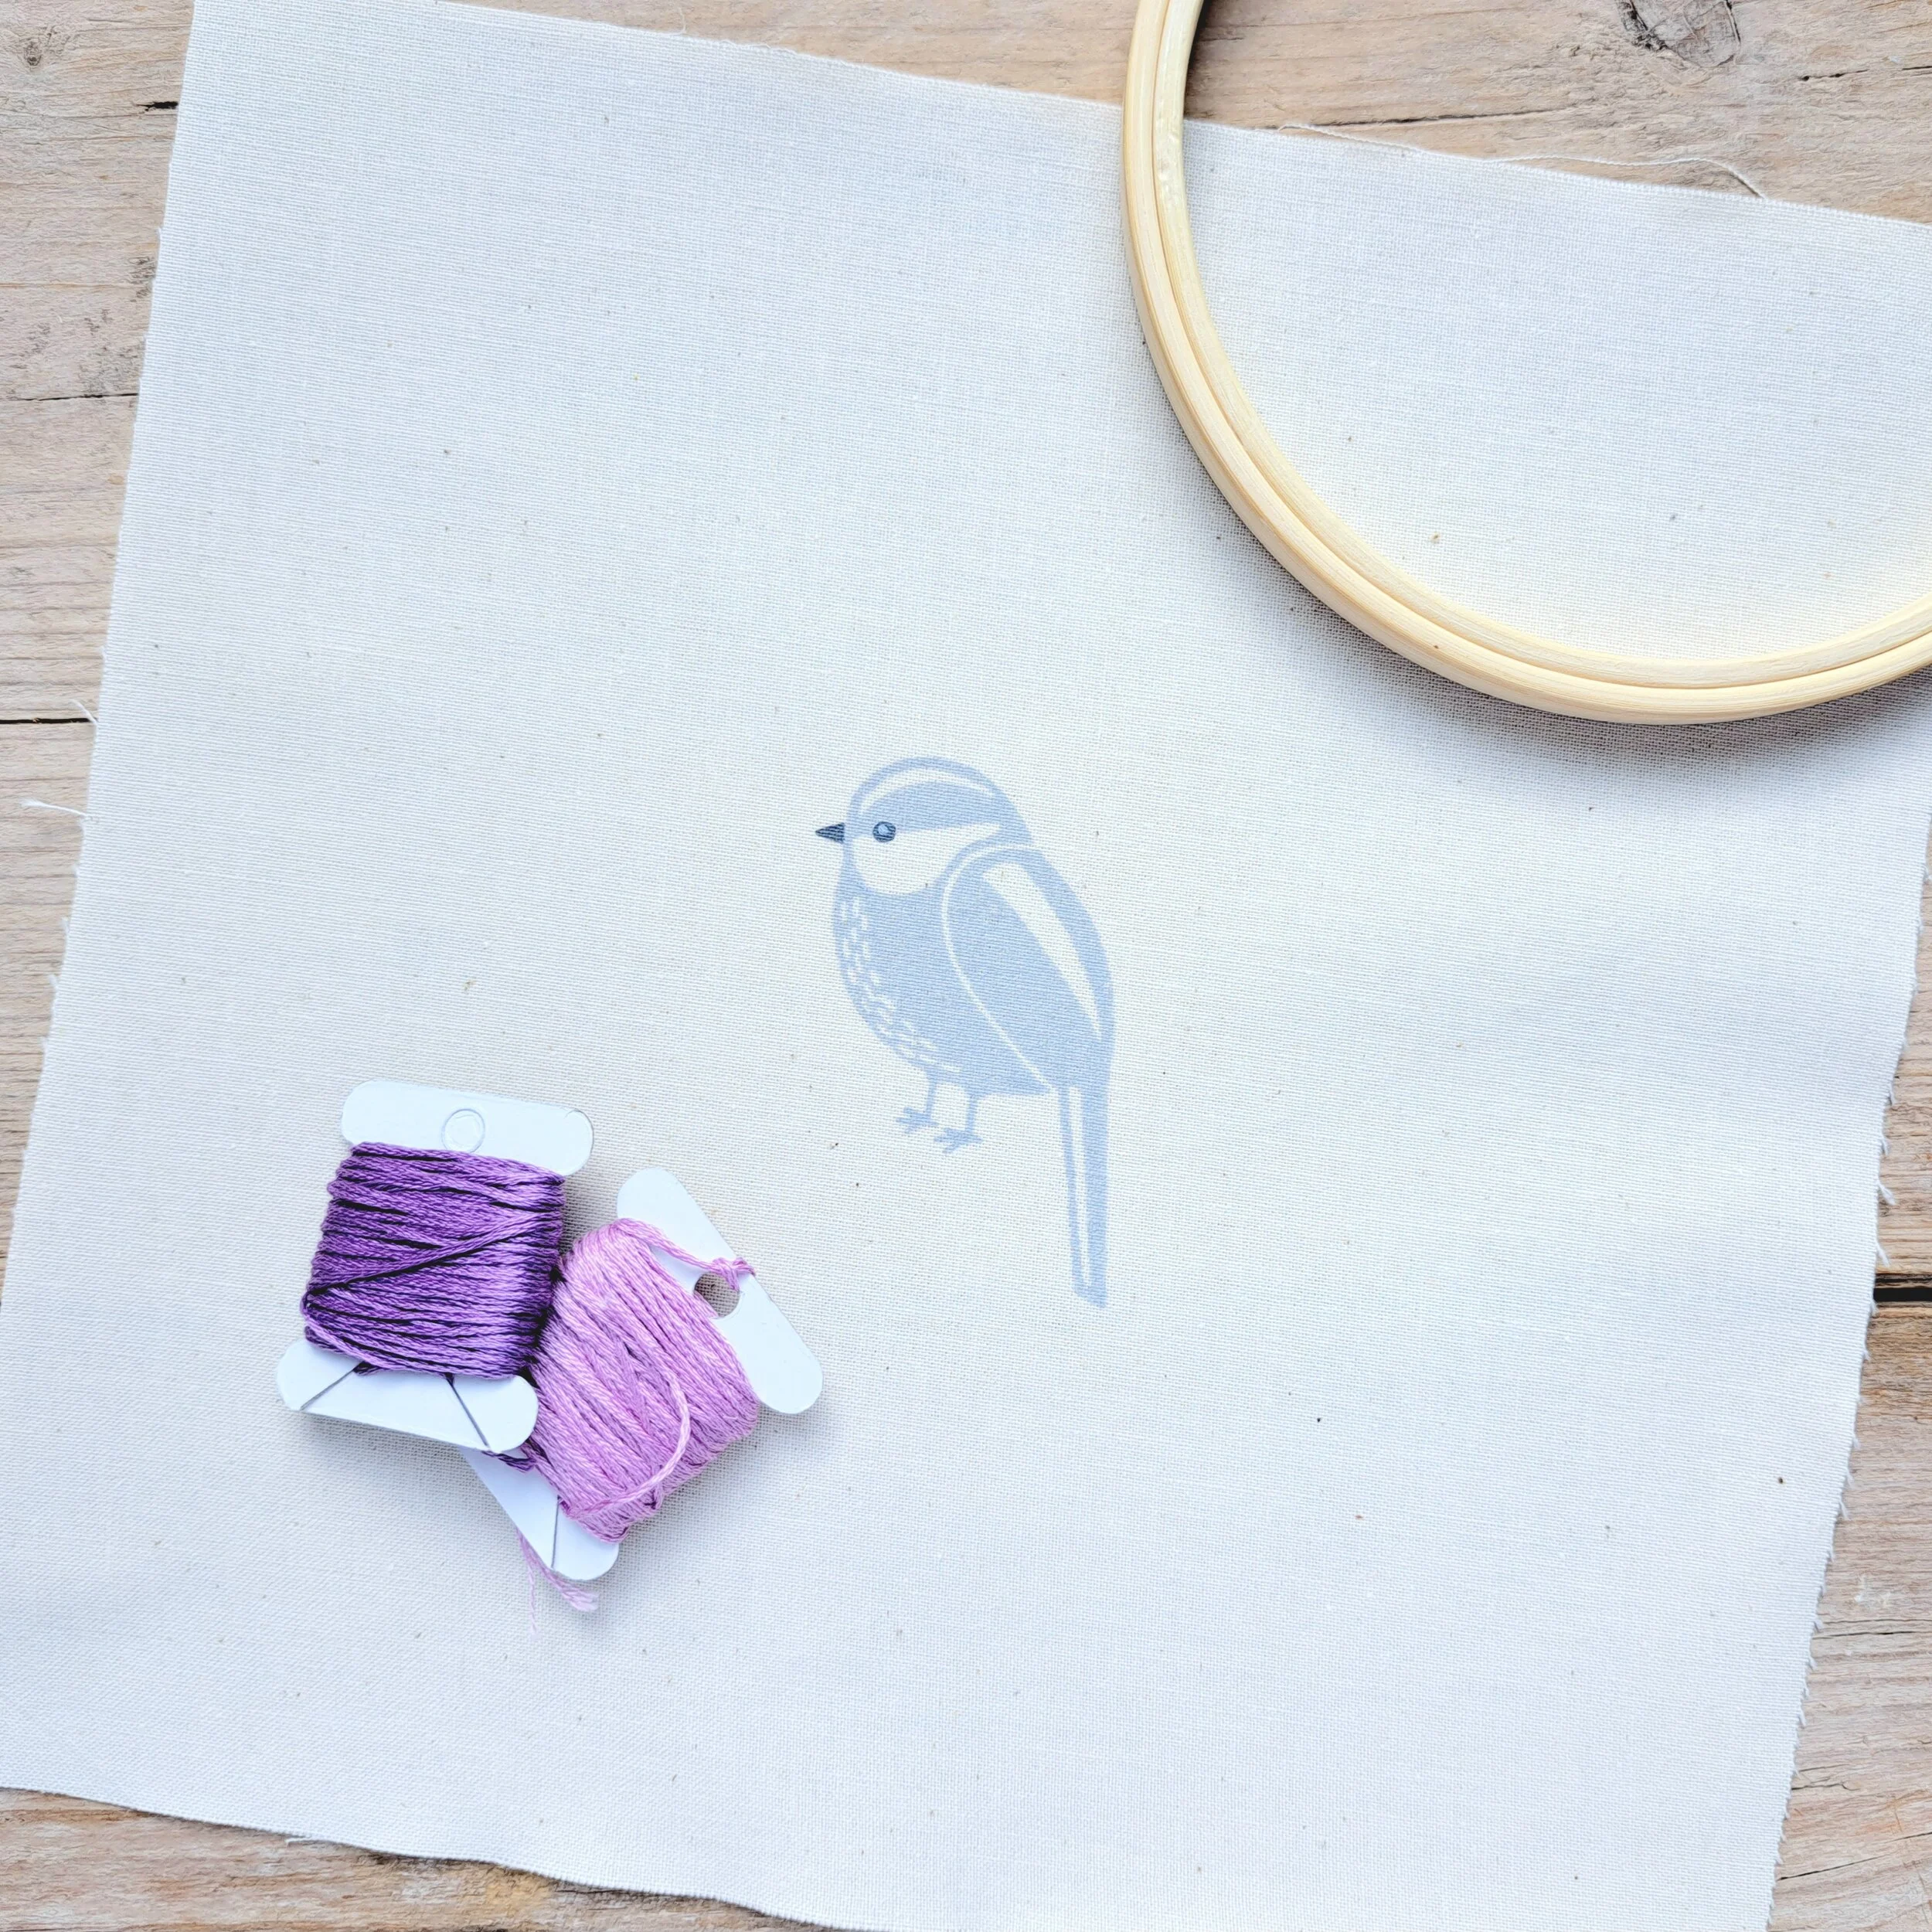
One of my Long Tailed tit Embroidery Squares. These are available to buy in my shop.
Note: This post is based on my original hand-printed panels, but the new versions still feature the same bird outline!
1.1 What you need for the background
Watercolour paints
Paintbrush
Cup of water
Plastic sheet (I used a bin liner)
1.2 What you need for the embroidery part
Embroidery threads. I used 5 colours from my Winter thread set plus an extra colour. Winter thread sets are available in my shop here but you can of course choose your fave threads for your bird.
5” Embroidery Hoop
Embroidery Needles
Scissors
If you’re brand new to this and don’t have any embroidery supplies yet (a big hello to you!), you may like the Embroidery Starter Sets that are available in my shop. They include a thread set of your choice (Spring, Summer, Autumn or Winter), a 5” hoop, a needle pack, a practice piece of fabric, a stitch card and a little guide on how to get started with your stitching. You can get yours here……
2. Painting the background
I wanted to keep this cute little fella nice and simple (on the stitching front) so thought I’d try something new for the background to add an extra level of interest…….watercolours! This was a really simple process and lots of fun to play with.

First, I protected the surface of my table with a plastic sheet. I used a bin liner.
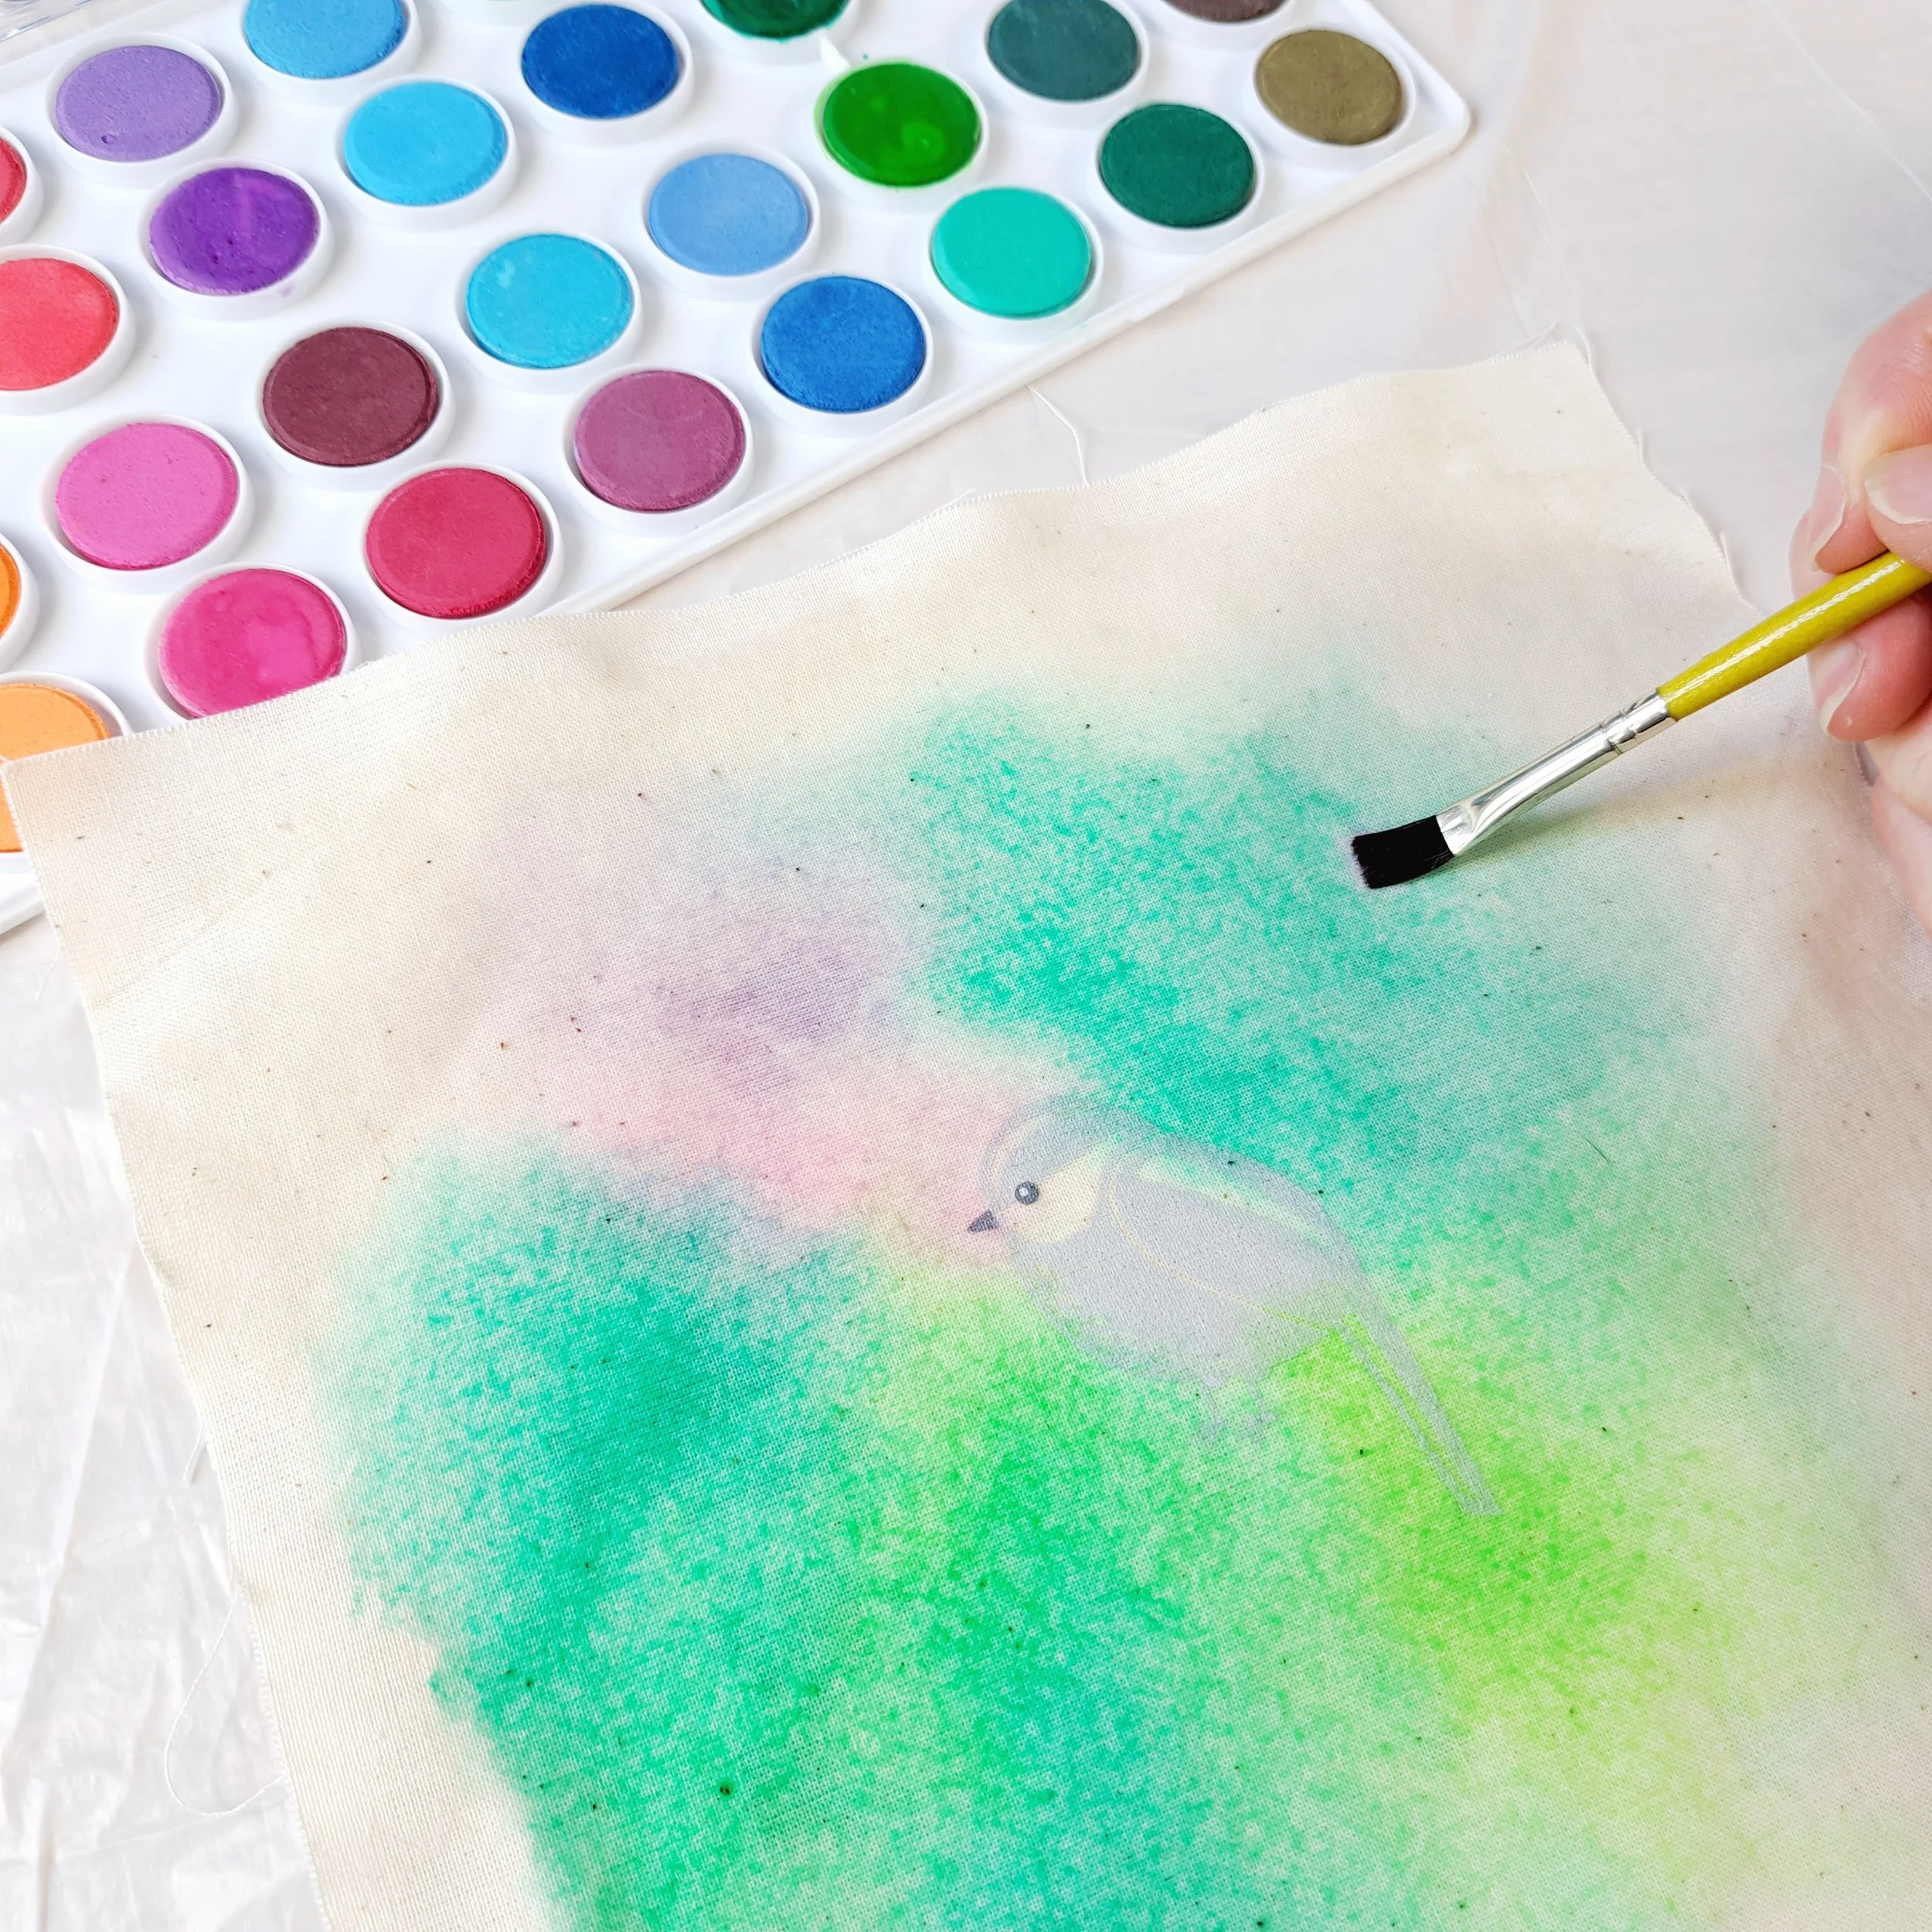
I placed the embroidery square onto the bin liner and gave the fabric a good soak with water. I did this by painting water all over the embroidery square with my paintbrush. Once the fabric was wet all over I was able to add the watercolour paints. I used a pallete of watercolour paint blocks that I purchased from my local craft shop. It contains a lovely selection of colours to choose from.
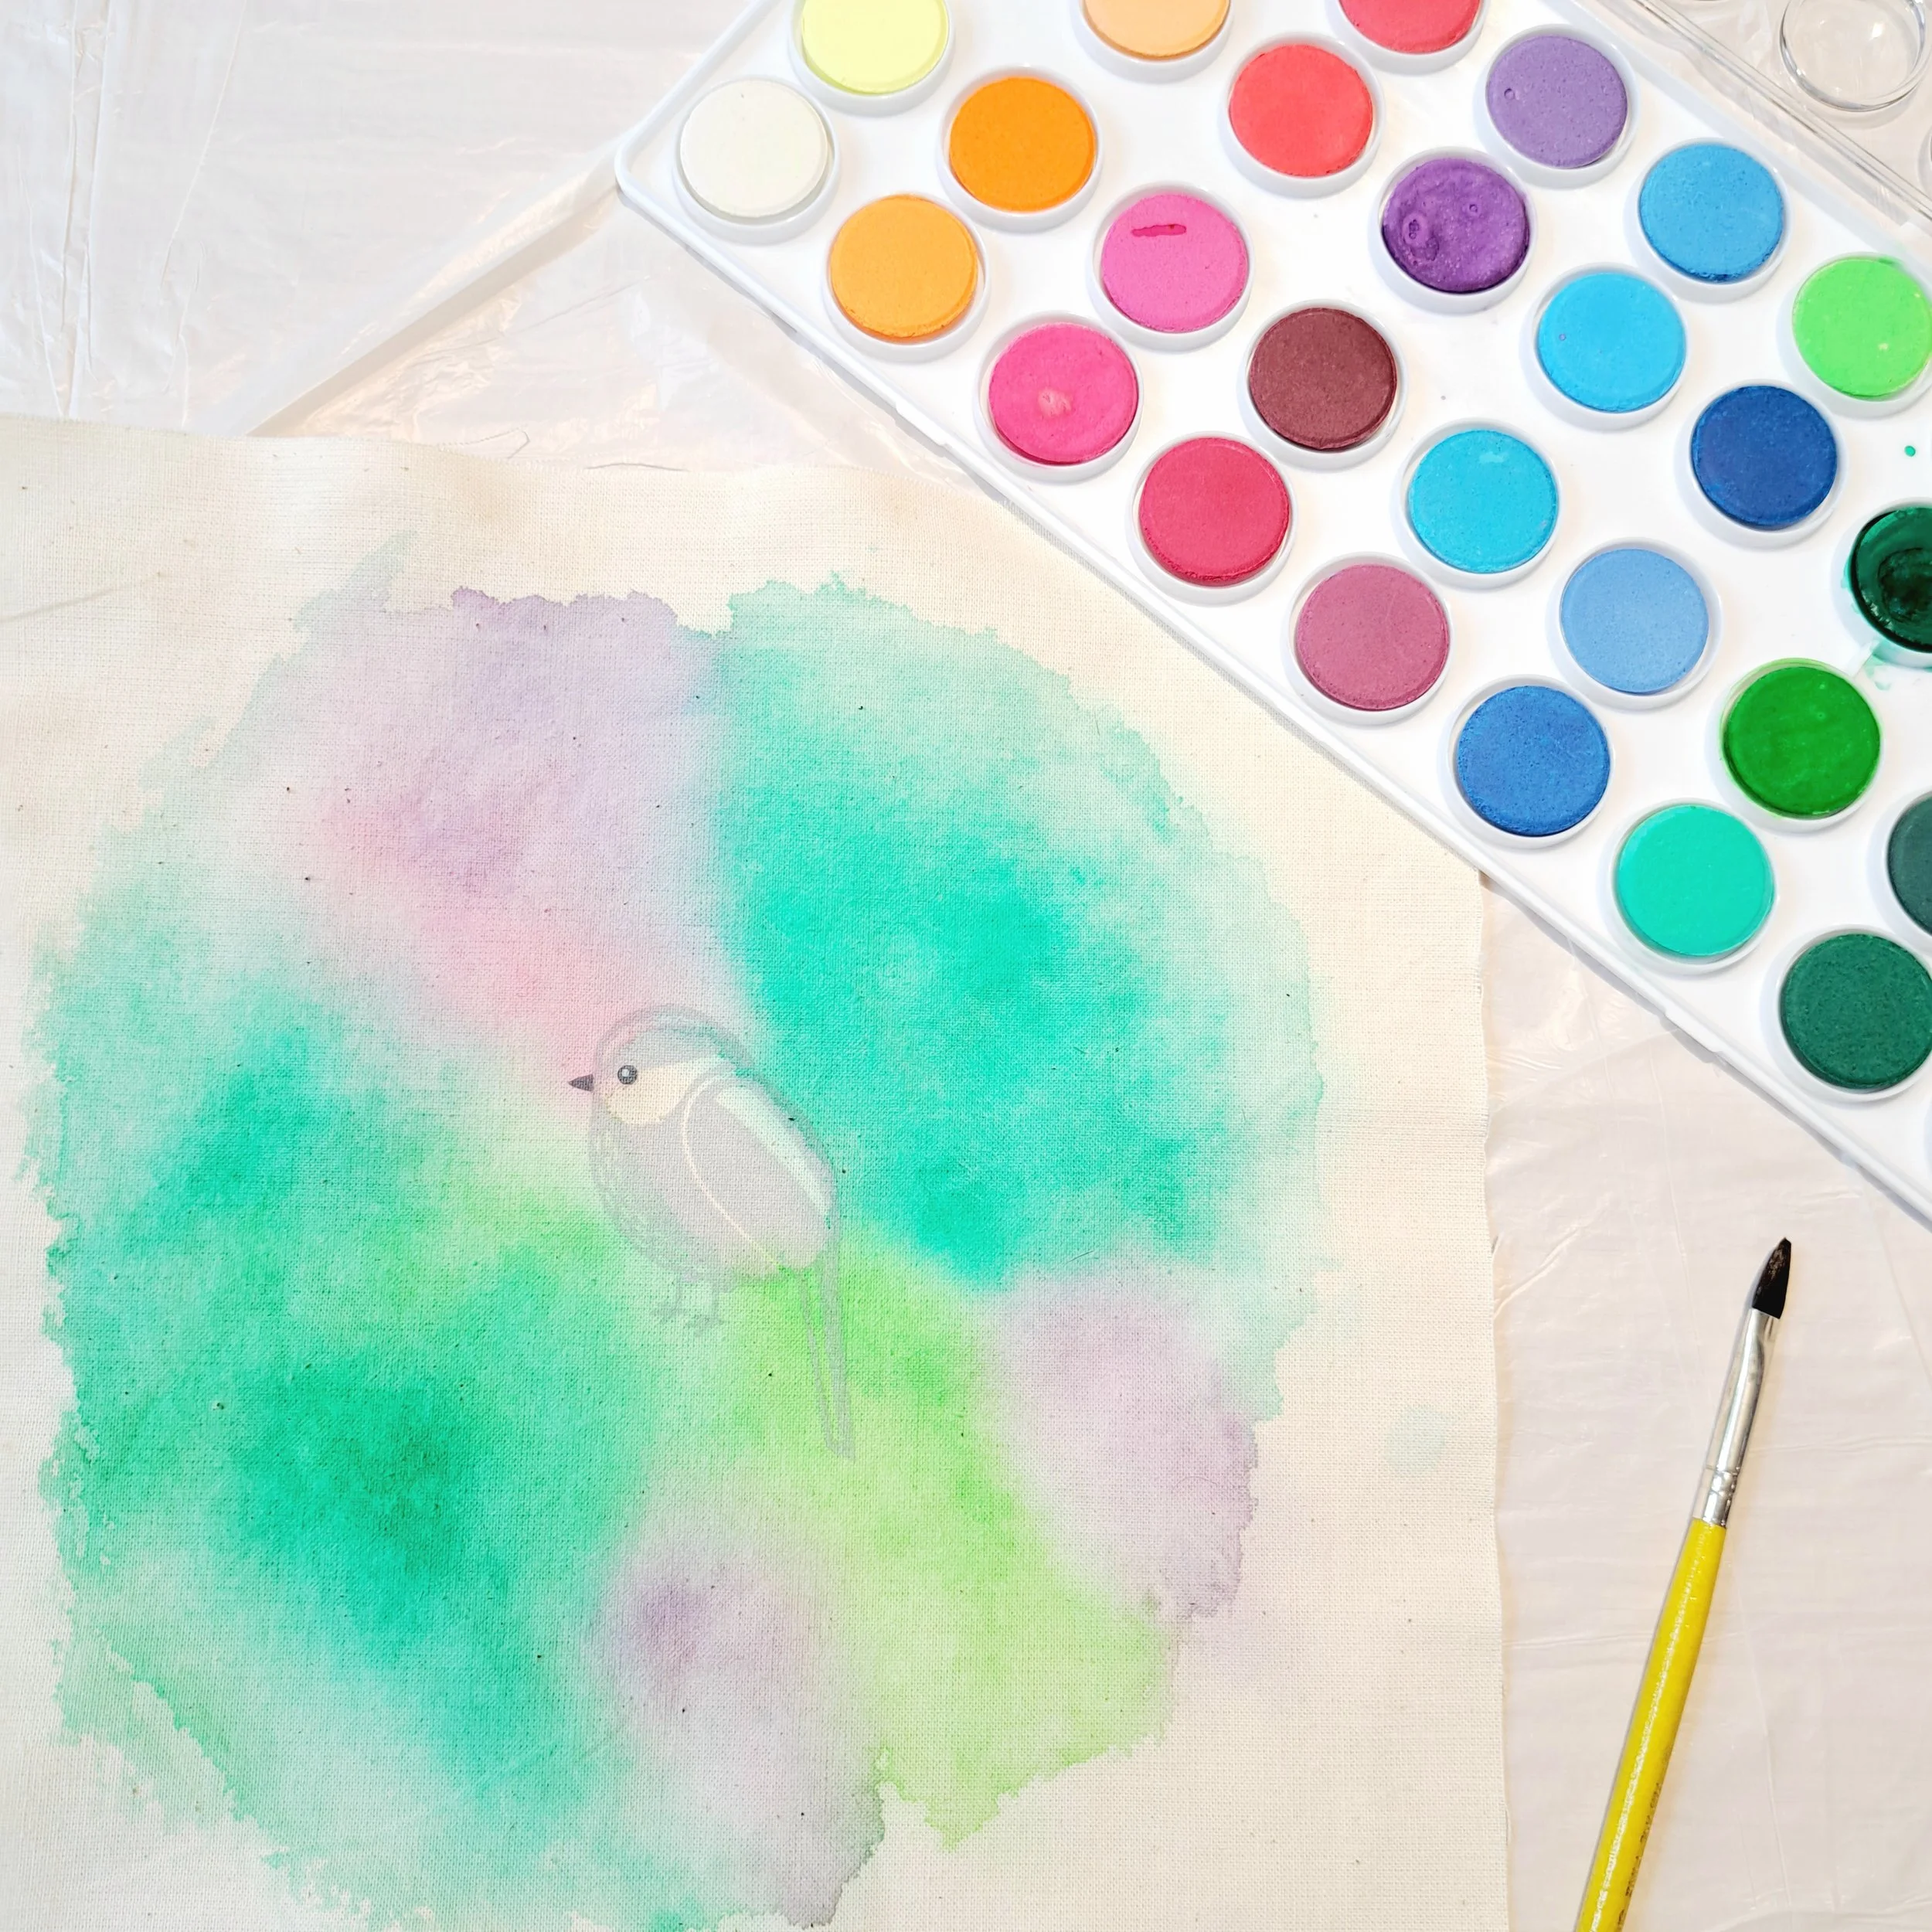
I knew that I wanted to stitch my Long Tailed Tit in pinks and purples, so I selected a few greeny colours for my background. First I loaded my paintbrush with one green paint and dabbed it onto the wet embroidery square. I then added a few different greens and purples, washing out my paintbrush between colour changes, and let them all bleed into each other on the fabric to create this tie dye effect. I think this tie dye look is really fun! I loved playing with the colours and developed a couple of very “technical” painting skills that I’ve named scrubbing and stabbing.
You could always just choose one colour for the background and make a lovely solid background colour or play with making a different pattern. Oh the possibilities with this are endless!
These paints will wash out though, so no good if you’re planning on turning your embroidery into something that’ll want washing once in a while…….. but mine will be hanging on my wall in the hoop.
Tip - Once you think you’ve added enough paint, check that you’ve filled your hoop area by holding the hoop over the top of your bird.
Once you’ve finished adding paint, remove the embroidery square from the plastic sheet and place flat on a towel to dry. If you’re a little impatient (like me), dry it with a hair drier.
Once fully dry, you’re ready to pop your square into your embroidery hoop for stitching.
3. The Stitching
For this embroidery project, I chose thread colours from my Winter thread set. I just think the pinks and purples are sooo well suited to this Long Tailed Tit. I chose 5 colours from the set and added an additional dark grey for the legs, beak and eye. My embroidery squares are made for you to colour in in whichever threads you choose though, there are no rules! So have fun picking colours that you like for your project.
I use needles from my needle sets (these are available in my shop too). The needle size that I refer to throughout this guide refer to this needle pack.
3.1 The stitches I used
Split Stitch
Stem Stitch
Satin Stitch
Straight Stitch
Fly Stitch
These are the stitches that I’ve used but you absolutely don’t need use the same stitches though……your long tailed tit will look adorable! Stick with stitches that you know and love to relax with your stitching; or experiment by learning some new stitches to play with.
3.2 The tail and wing
Stitch – Split Stitch
Thread colours – Anchor 69 & 92
Number of strands – 3
Needle size – Middle Sized
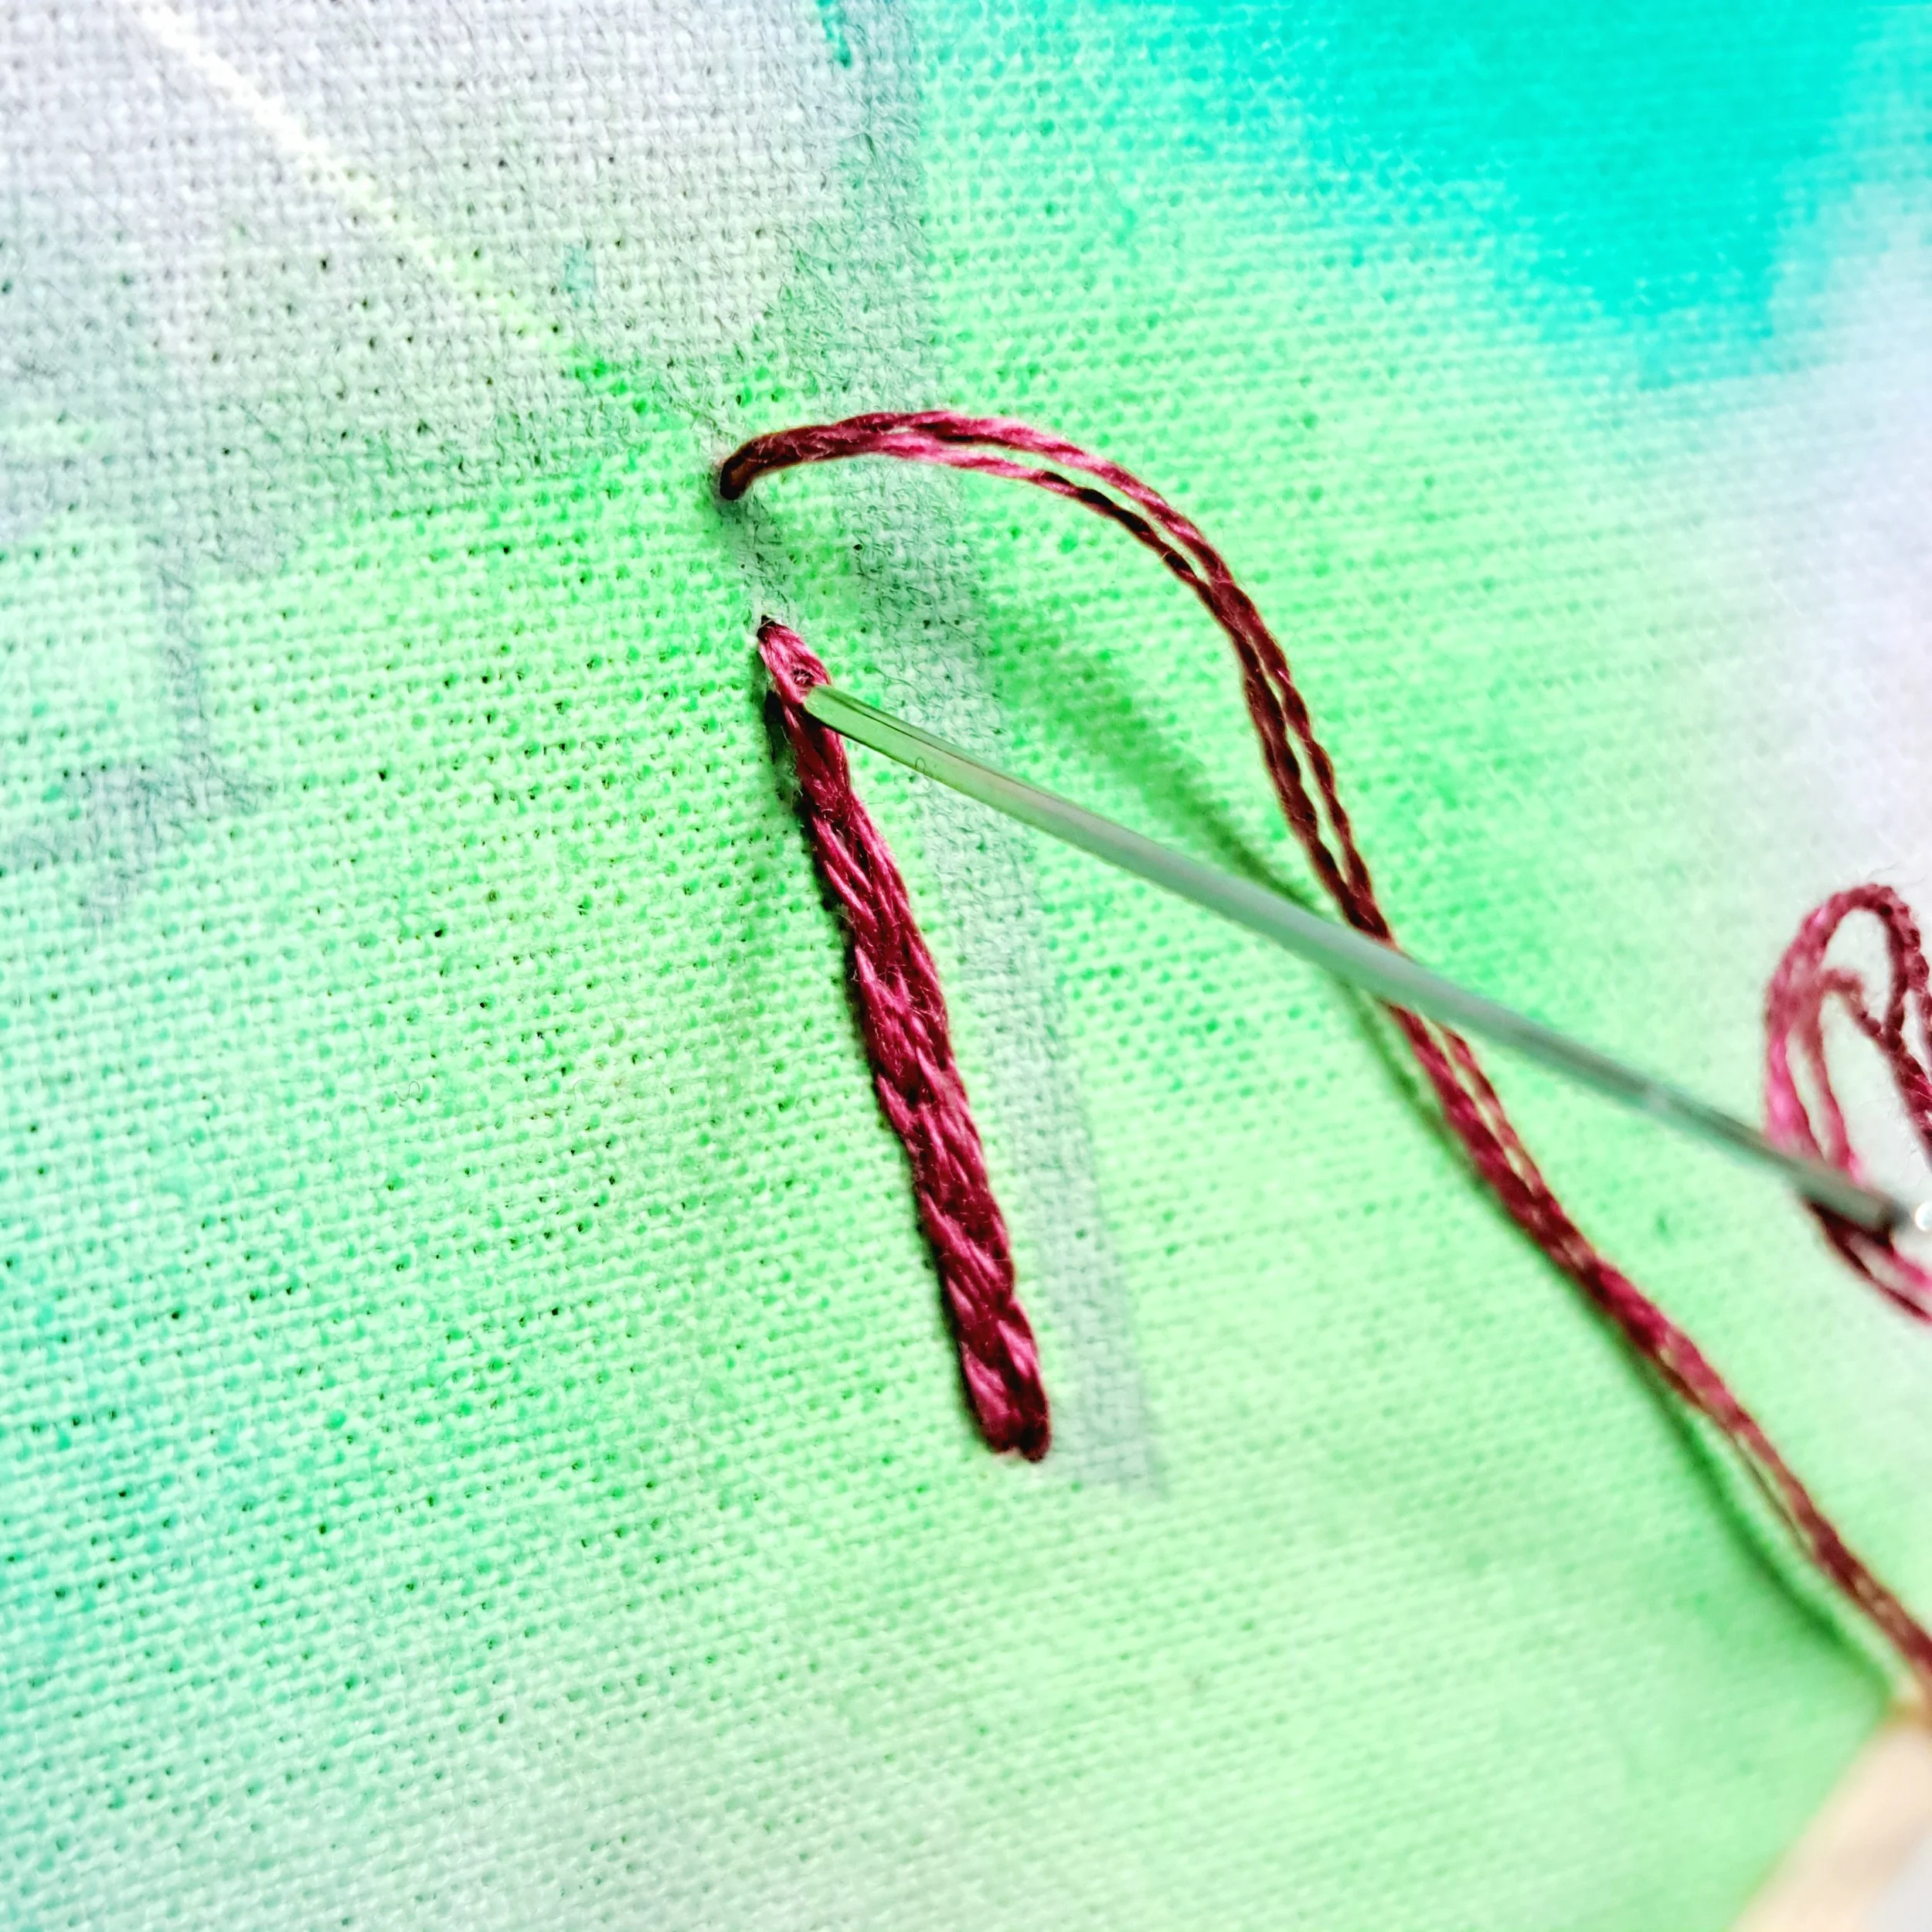
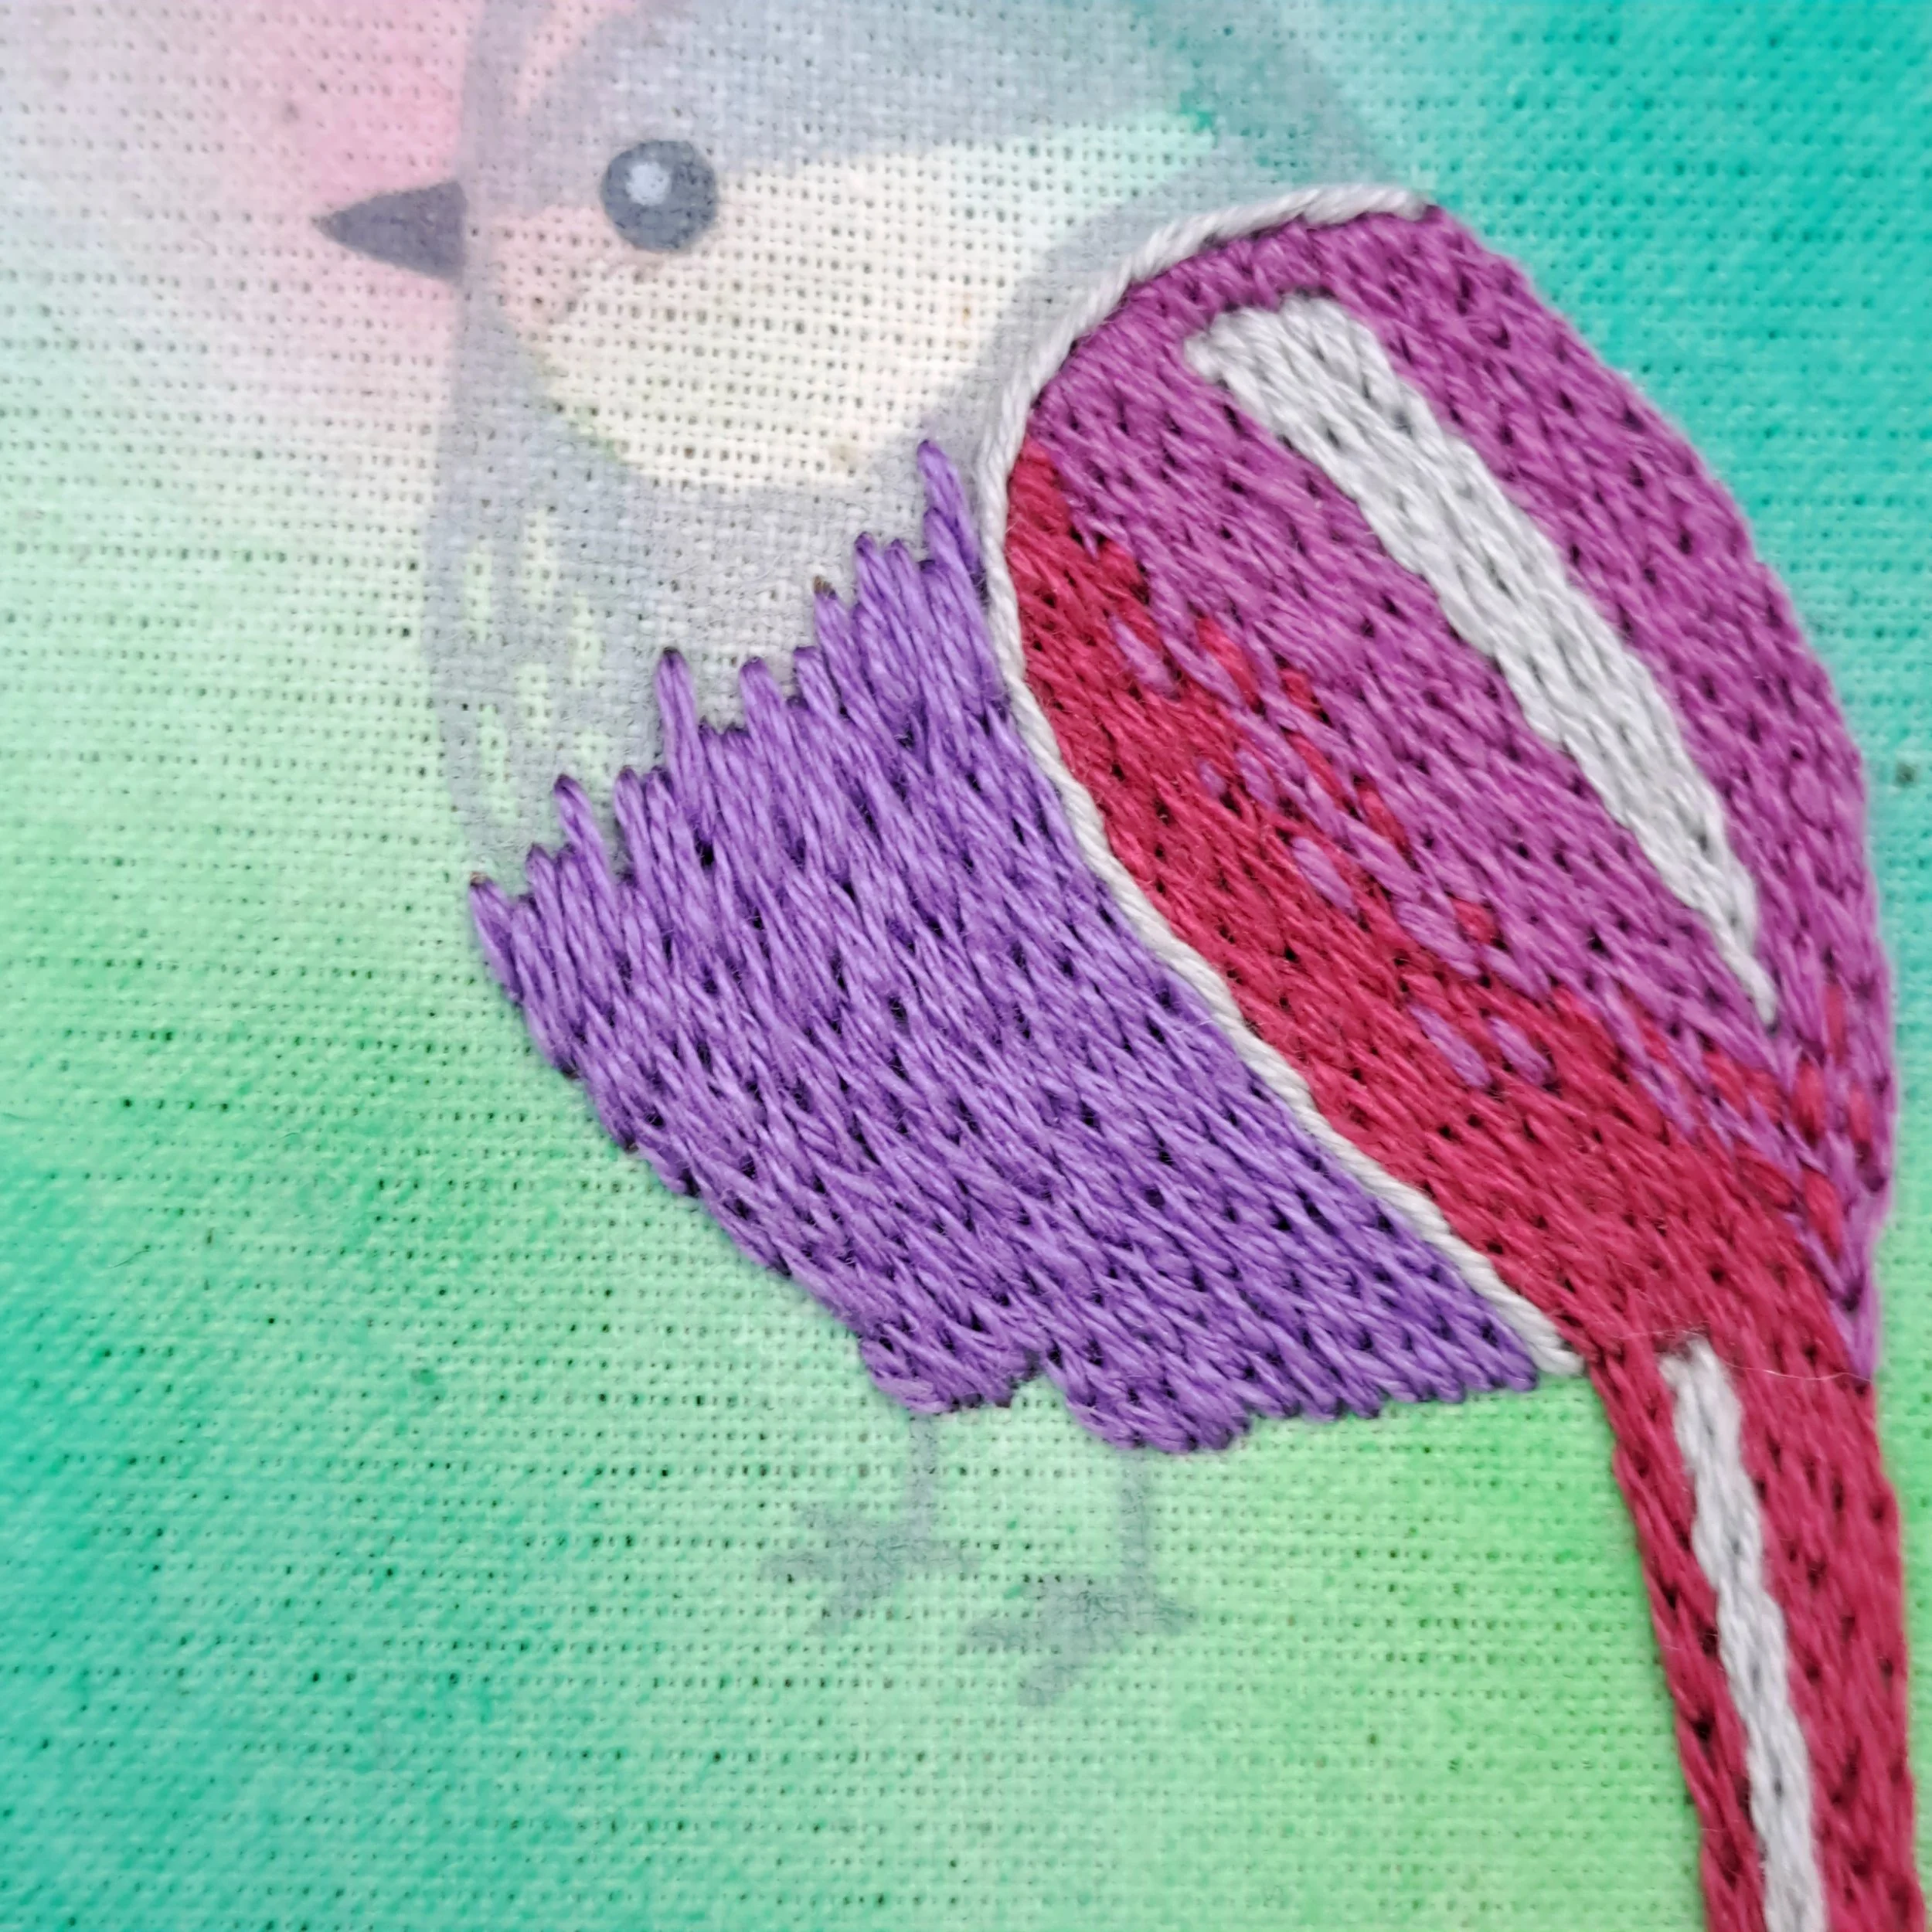
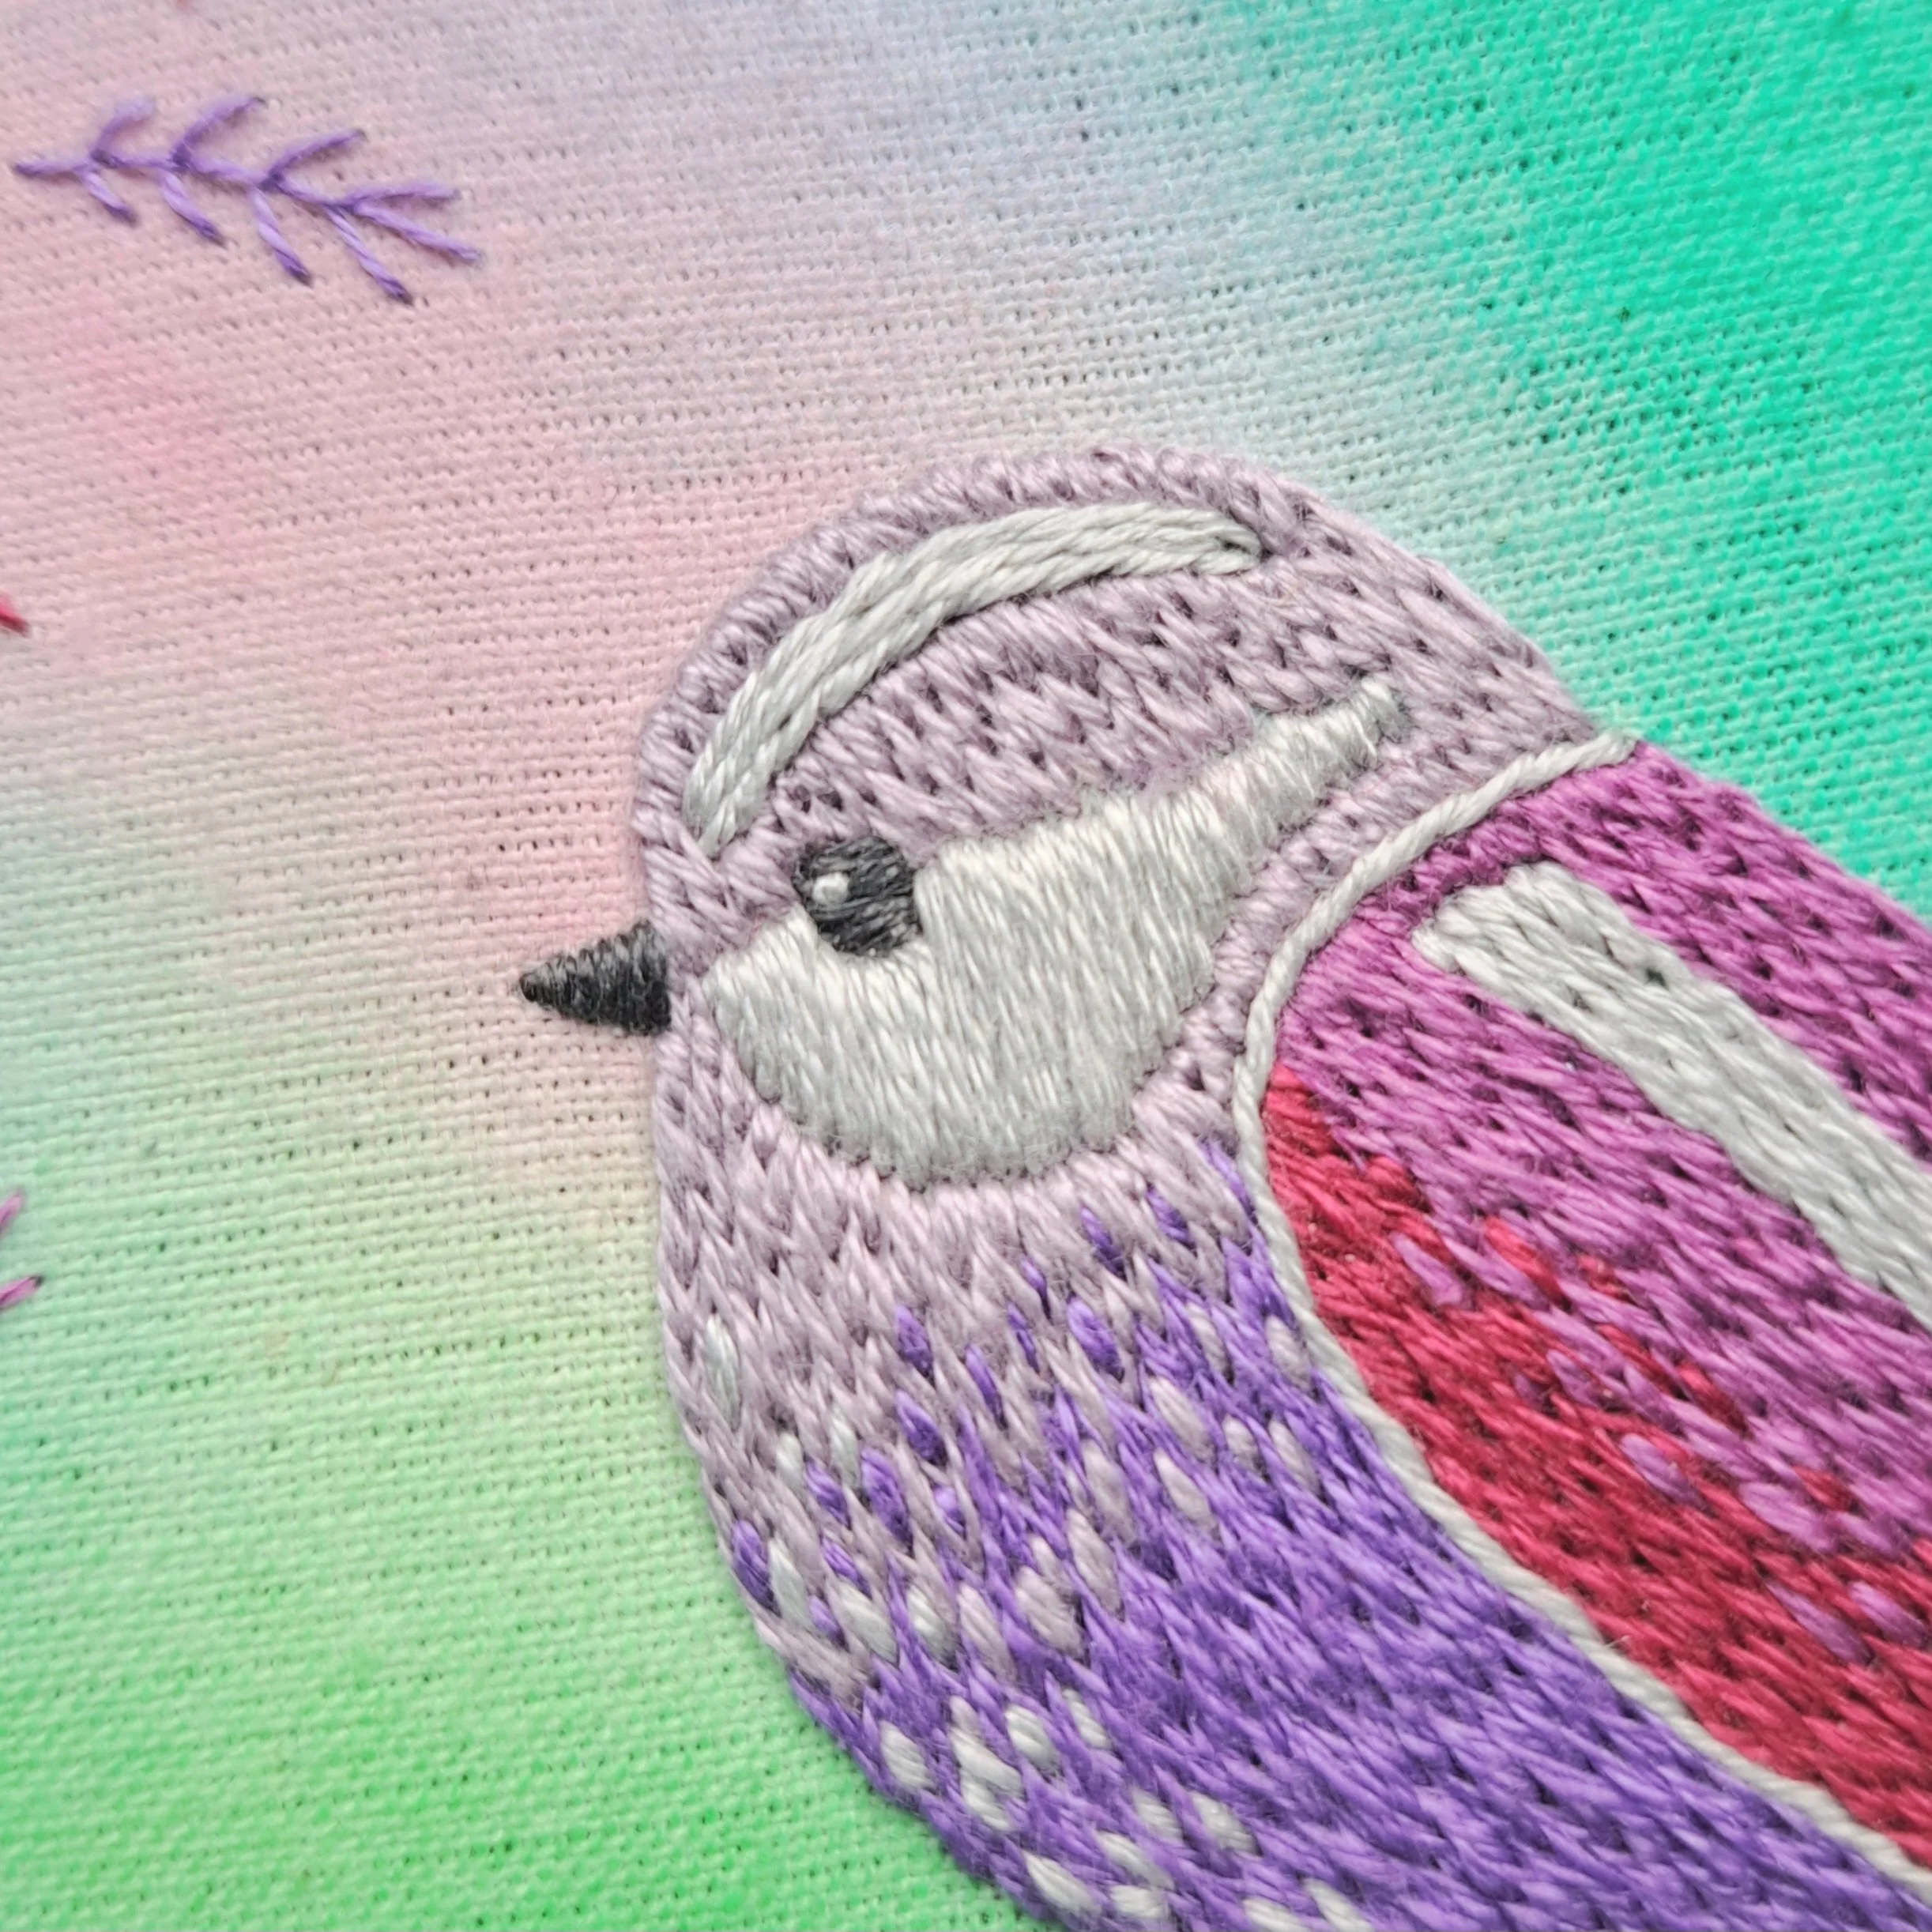
I used Split Stitch with 3 strands of thread for the entire main area of this little birdie, I just love using split stitch to make feathery or furry texture. Changing the thread colour looks so effective especially when you blend them together a bit.
Before stitching, I drew a line along the wing where I wanted to change colour. I used a fabric pen for this but as this line will be completely covered by stitches you could use an ordinary pencil.
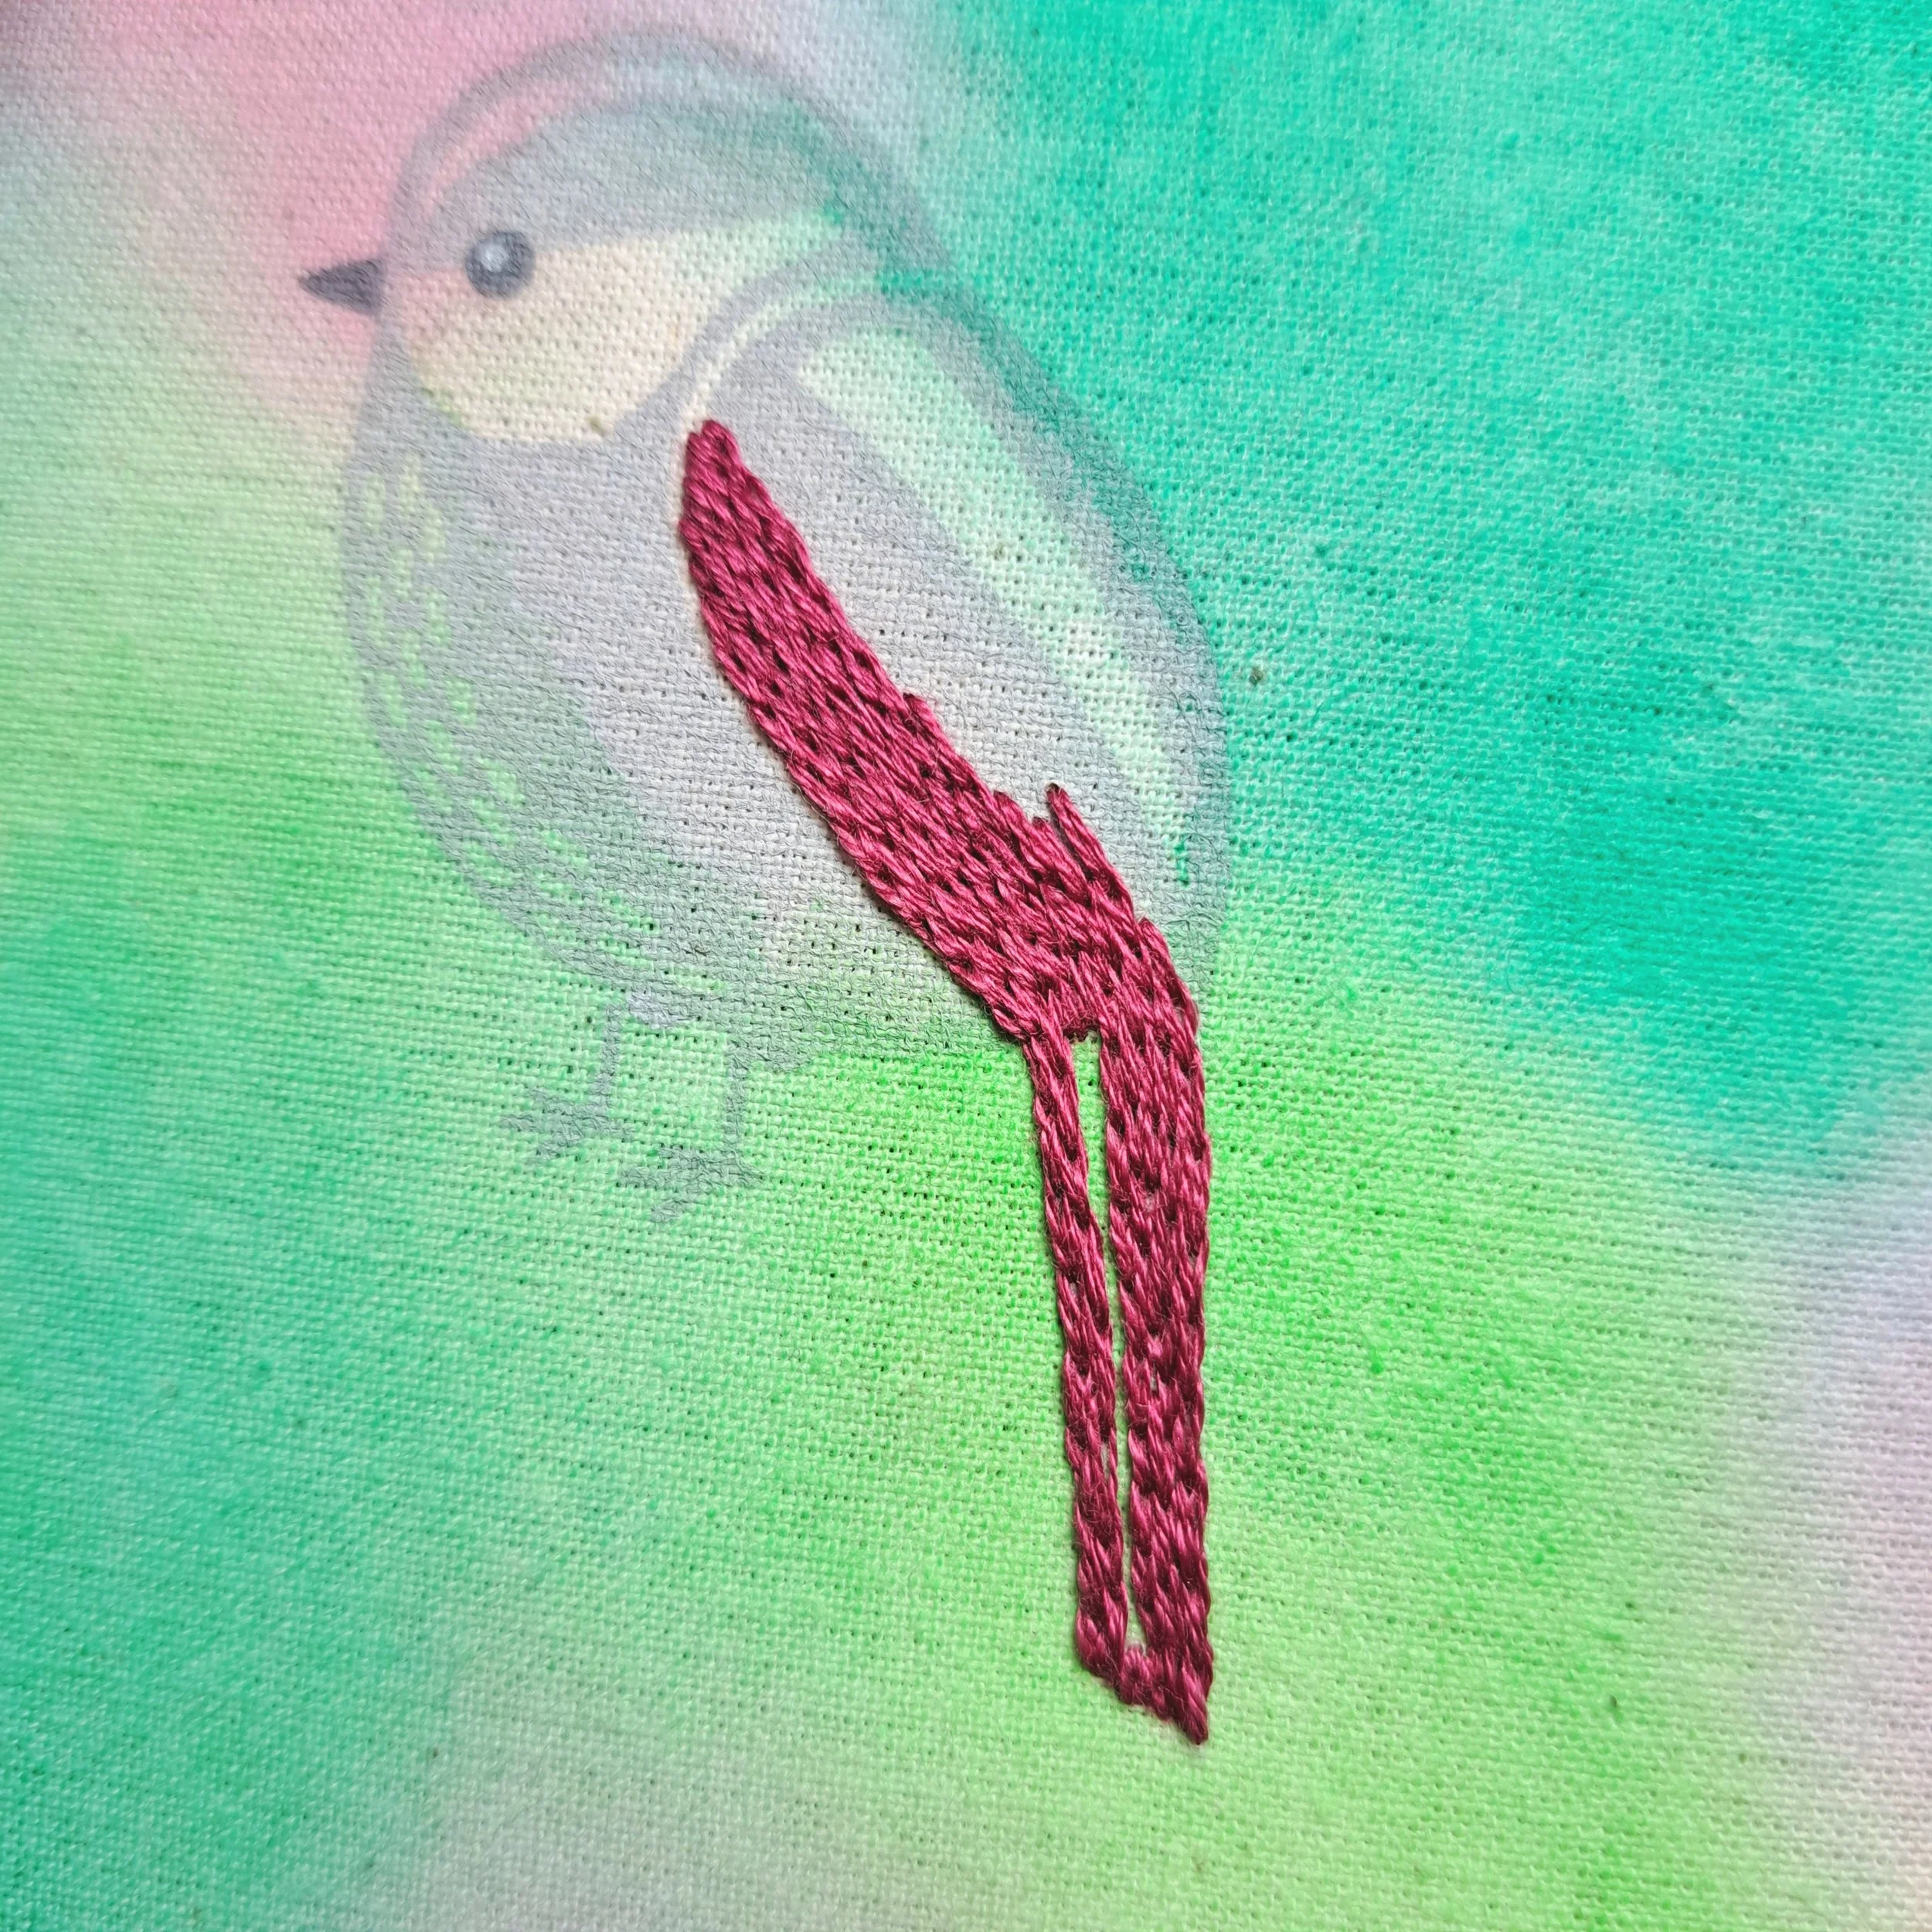
I started stitching at the bottom of his tail using Anchor 69 and stitched vertically. I continued to stitch vertical rows of split stitch until I reached the colour blend line.
I then added a few small straight stitches just the other side of the blend line. These will help to blend this colour into the rest of the wing and blur this line.
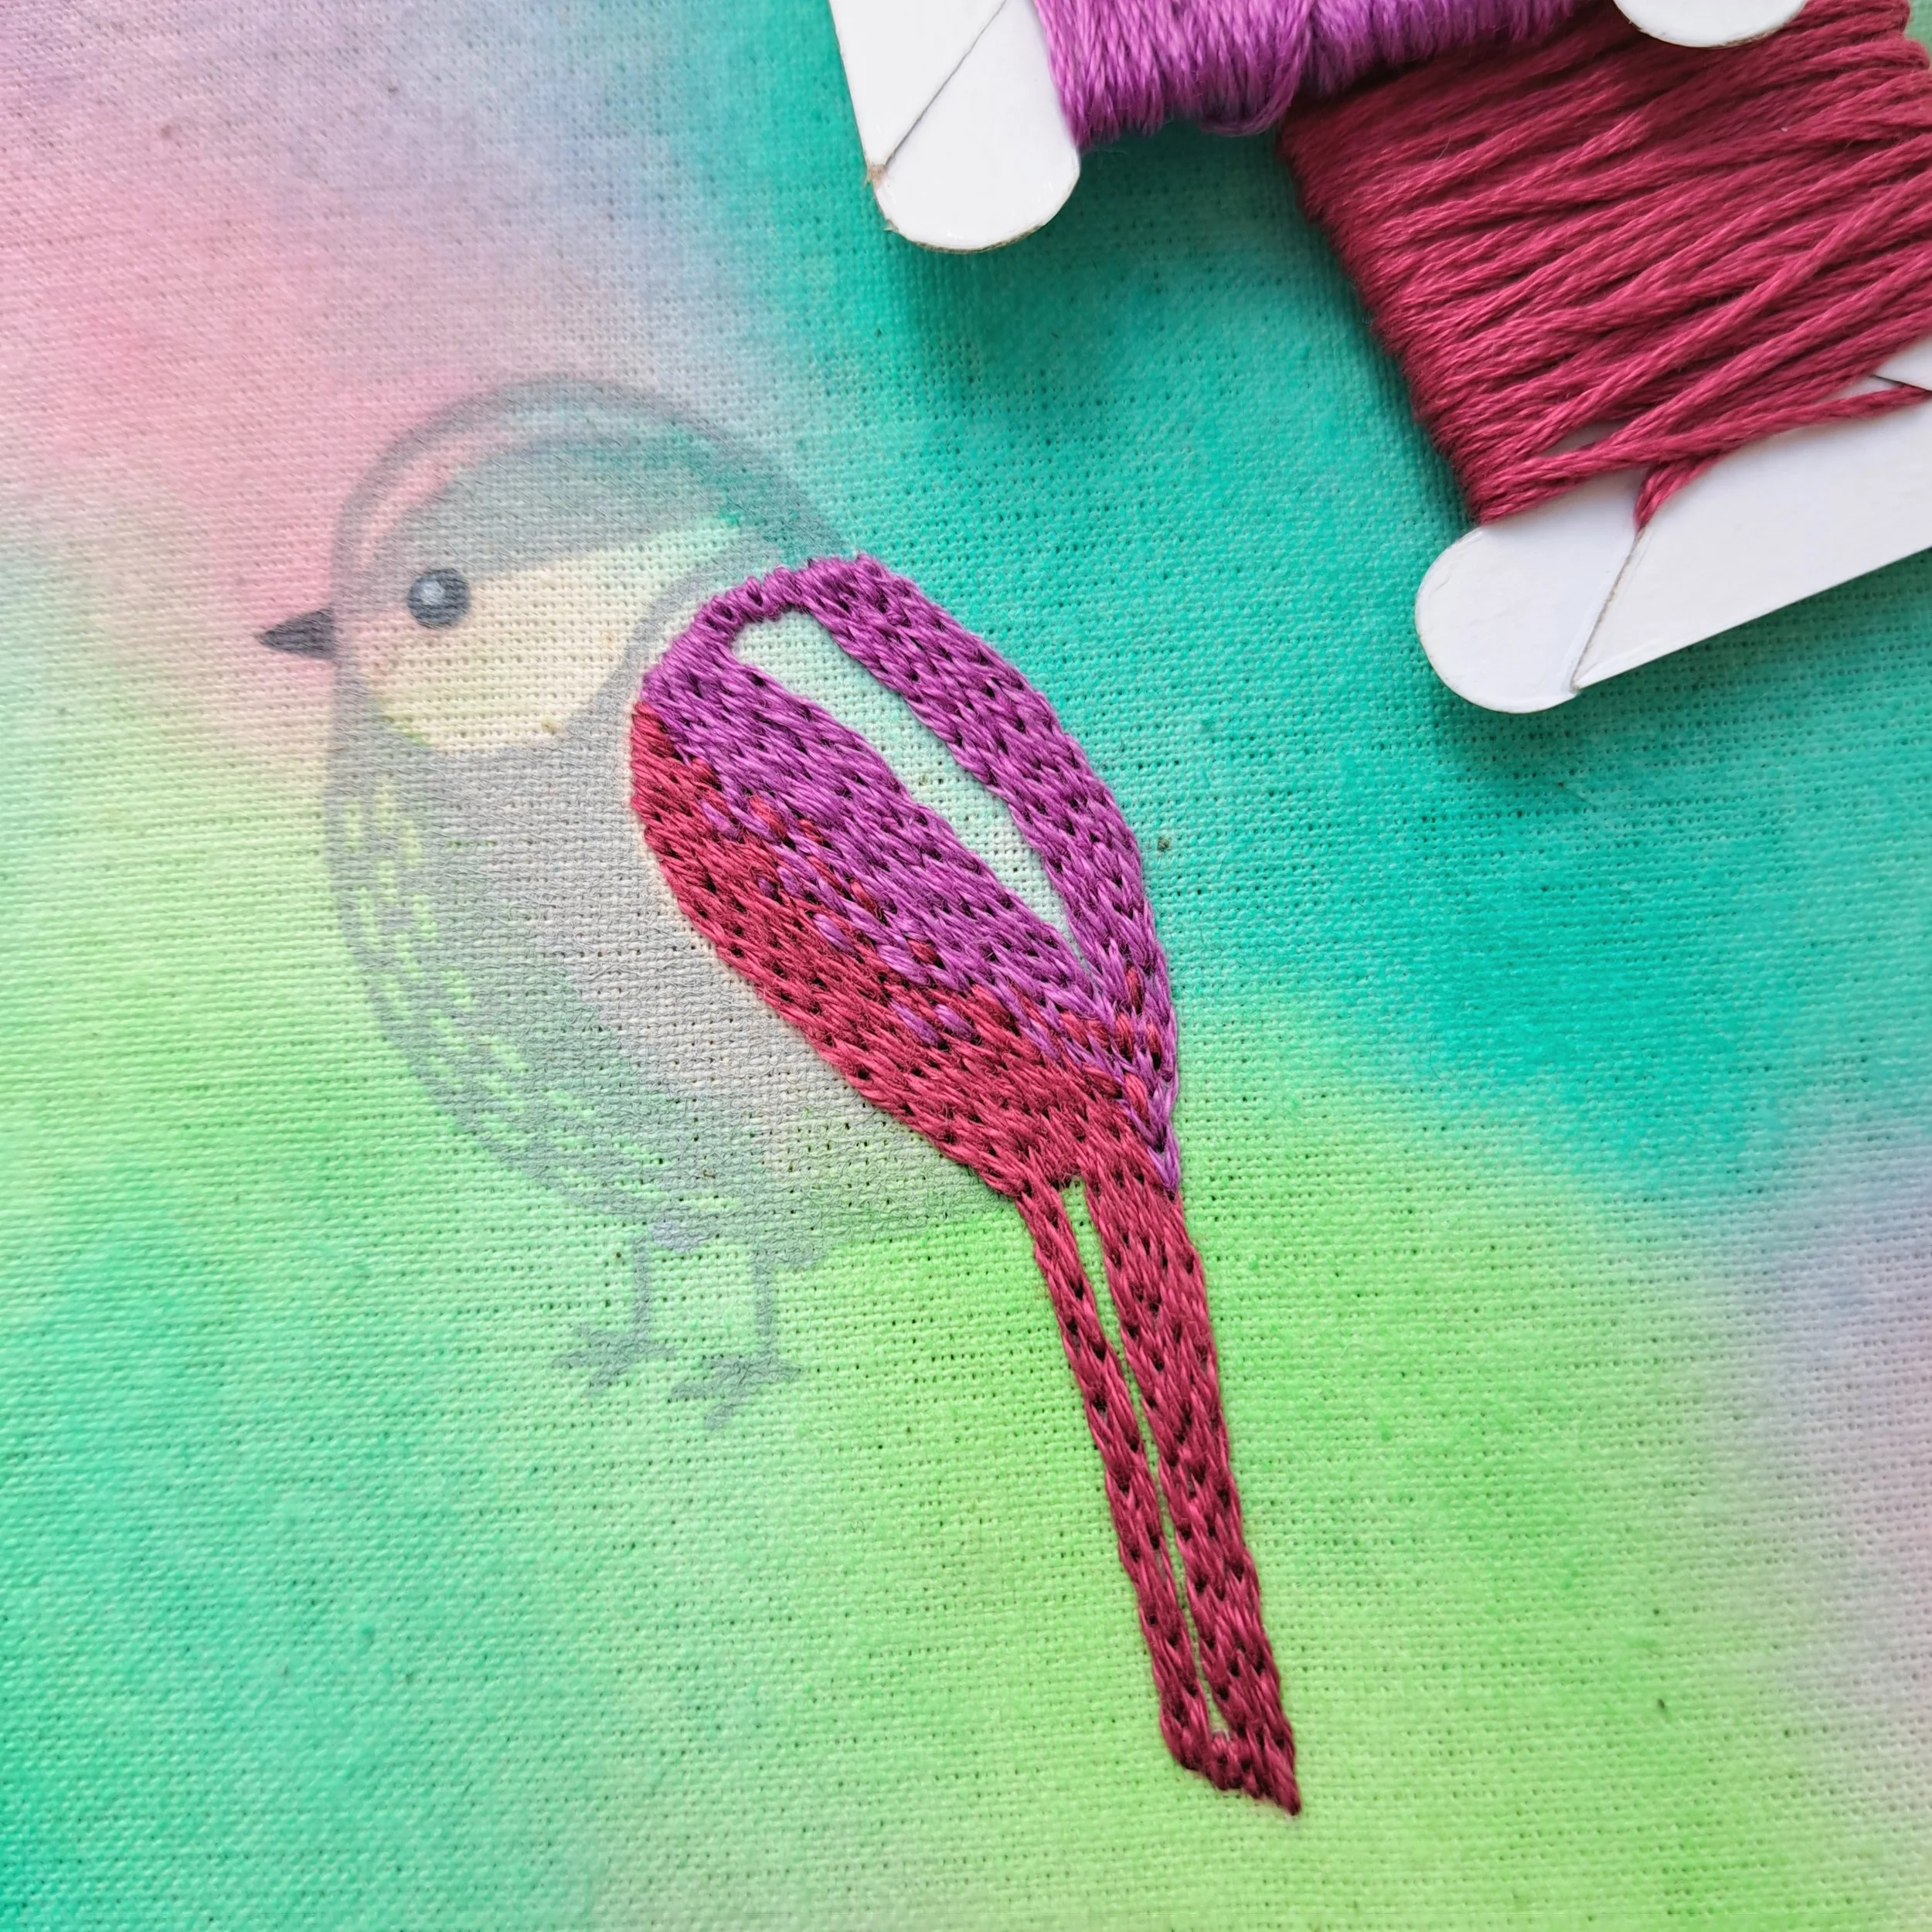
I filled in the remainder of the wing with Anchor 92 in the same way.
To add to the blending, I added several straight stitches on top of the Anchor 69 area.
3.3 Wing and tail markings
Stitch – Stem Stitch
Thread colours – Anchor 398
Number of strands – 3
Needle size – Middle Sized
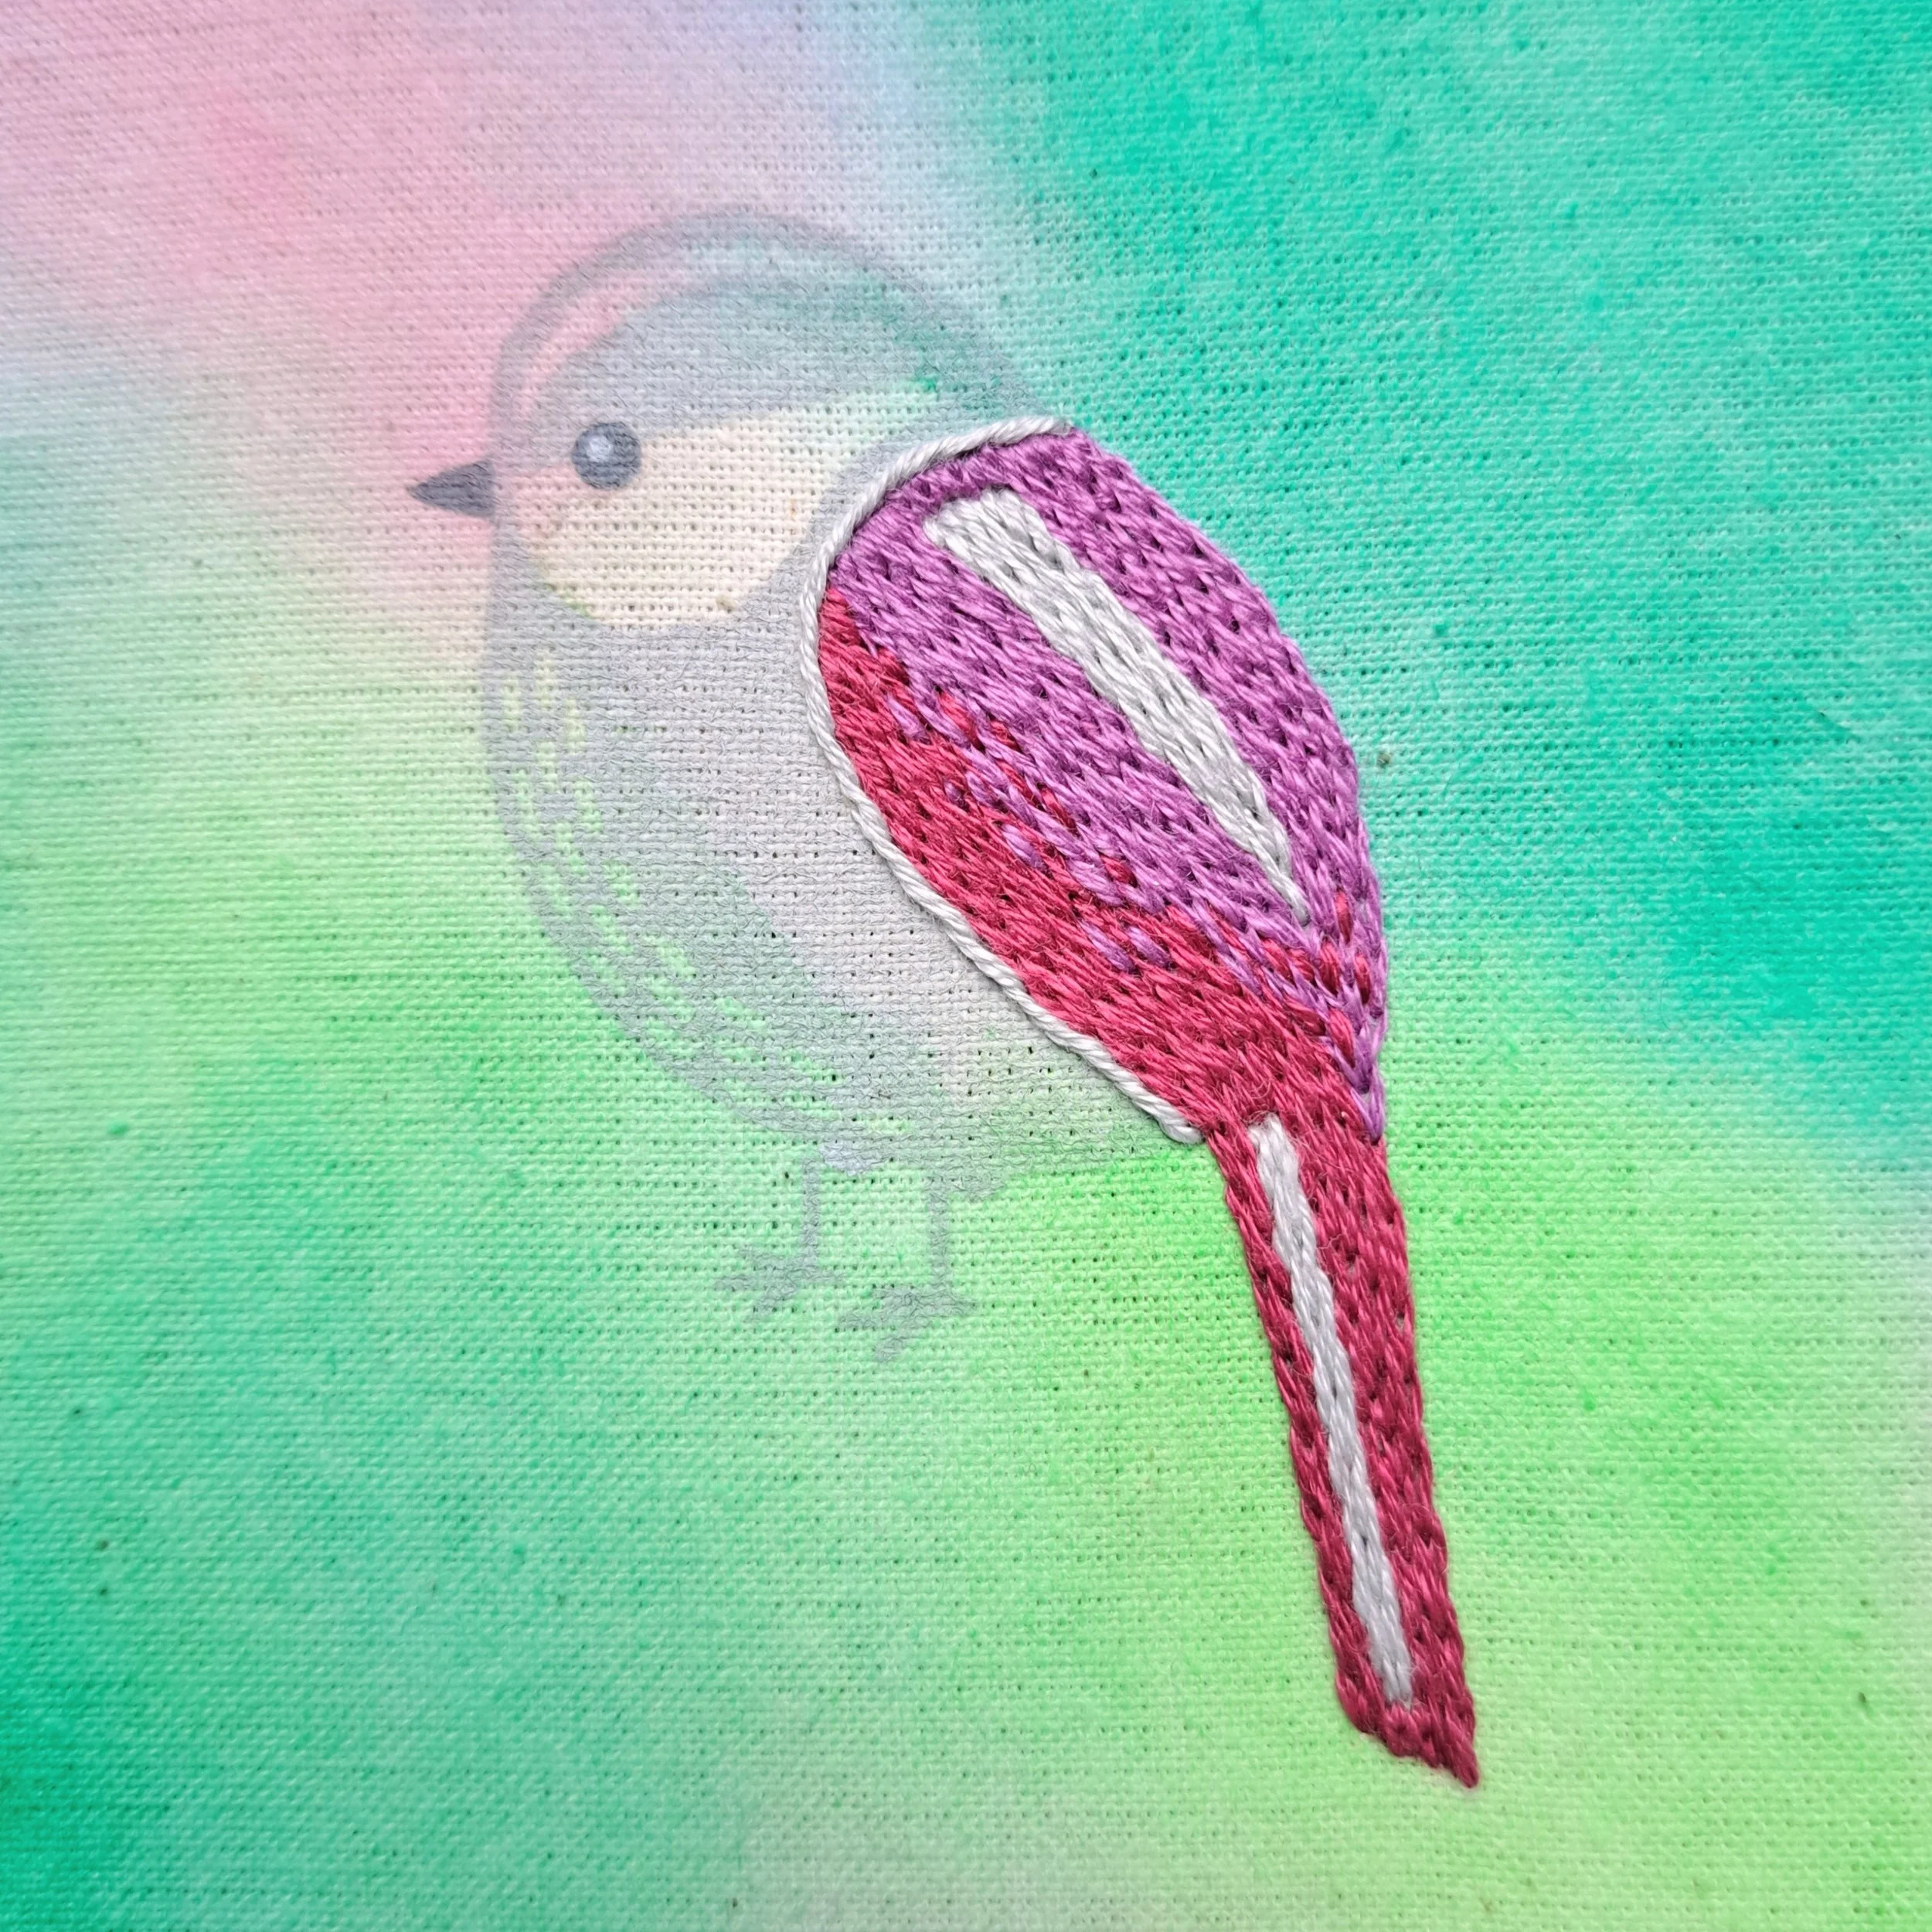
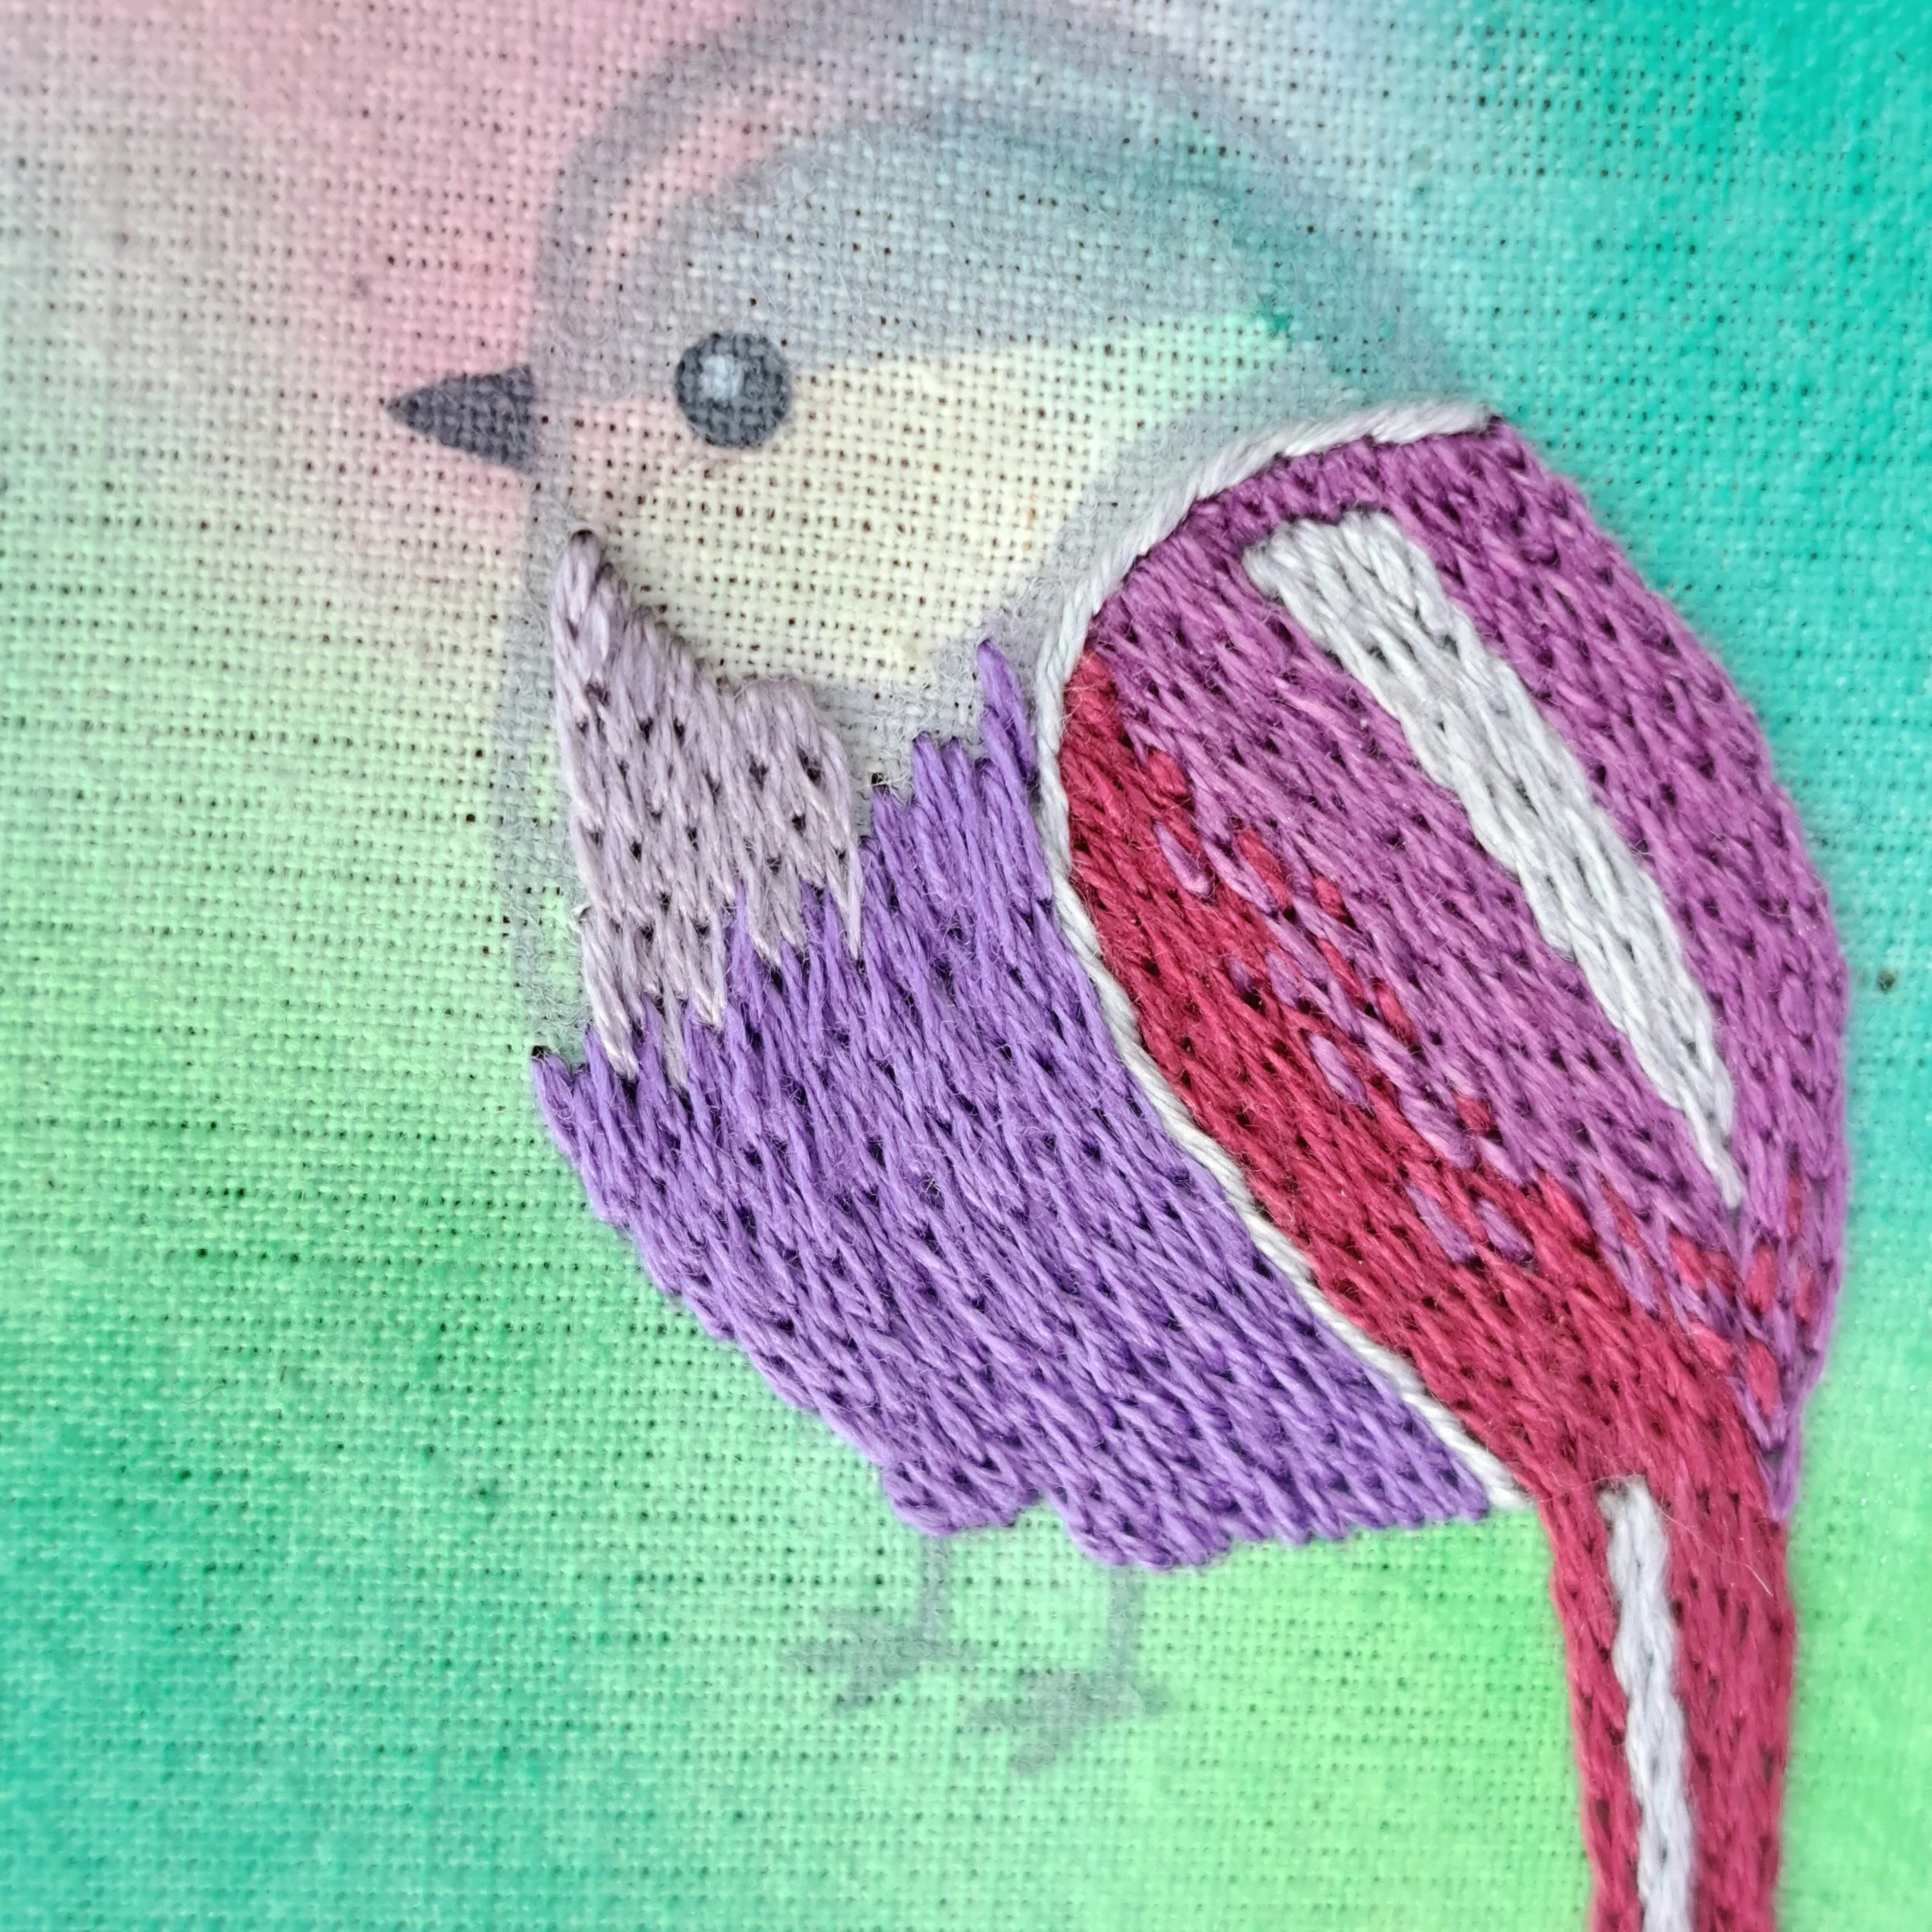
I stitched 2 rows of stem stitch to fill in the tail markings.
For the wing, I stitched the outside rows first starting from the same hole so that they make a nice sharp point. Then I filled in the middle of this triangle with 2 shorter rows of stem stitch.
3.4. Wing outline
Stitch – Stem Stitch
Thread colours – Anchor 398
Number of strands – 3
Needle size – Middle Sized
Stitch one row of stem stitch to outline the wing.
3.5 The main body
Stitch – Split Stitch
Thread colours – Anchor 110 & 870
Number of strands – 3
Needle size – Middle Sized
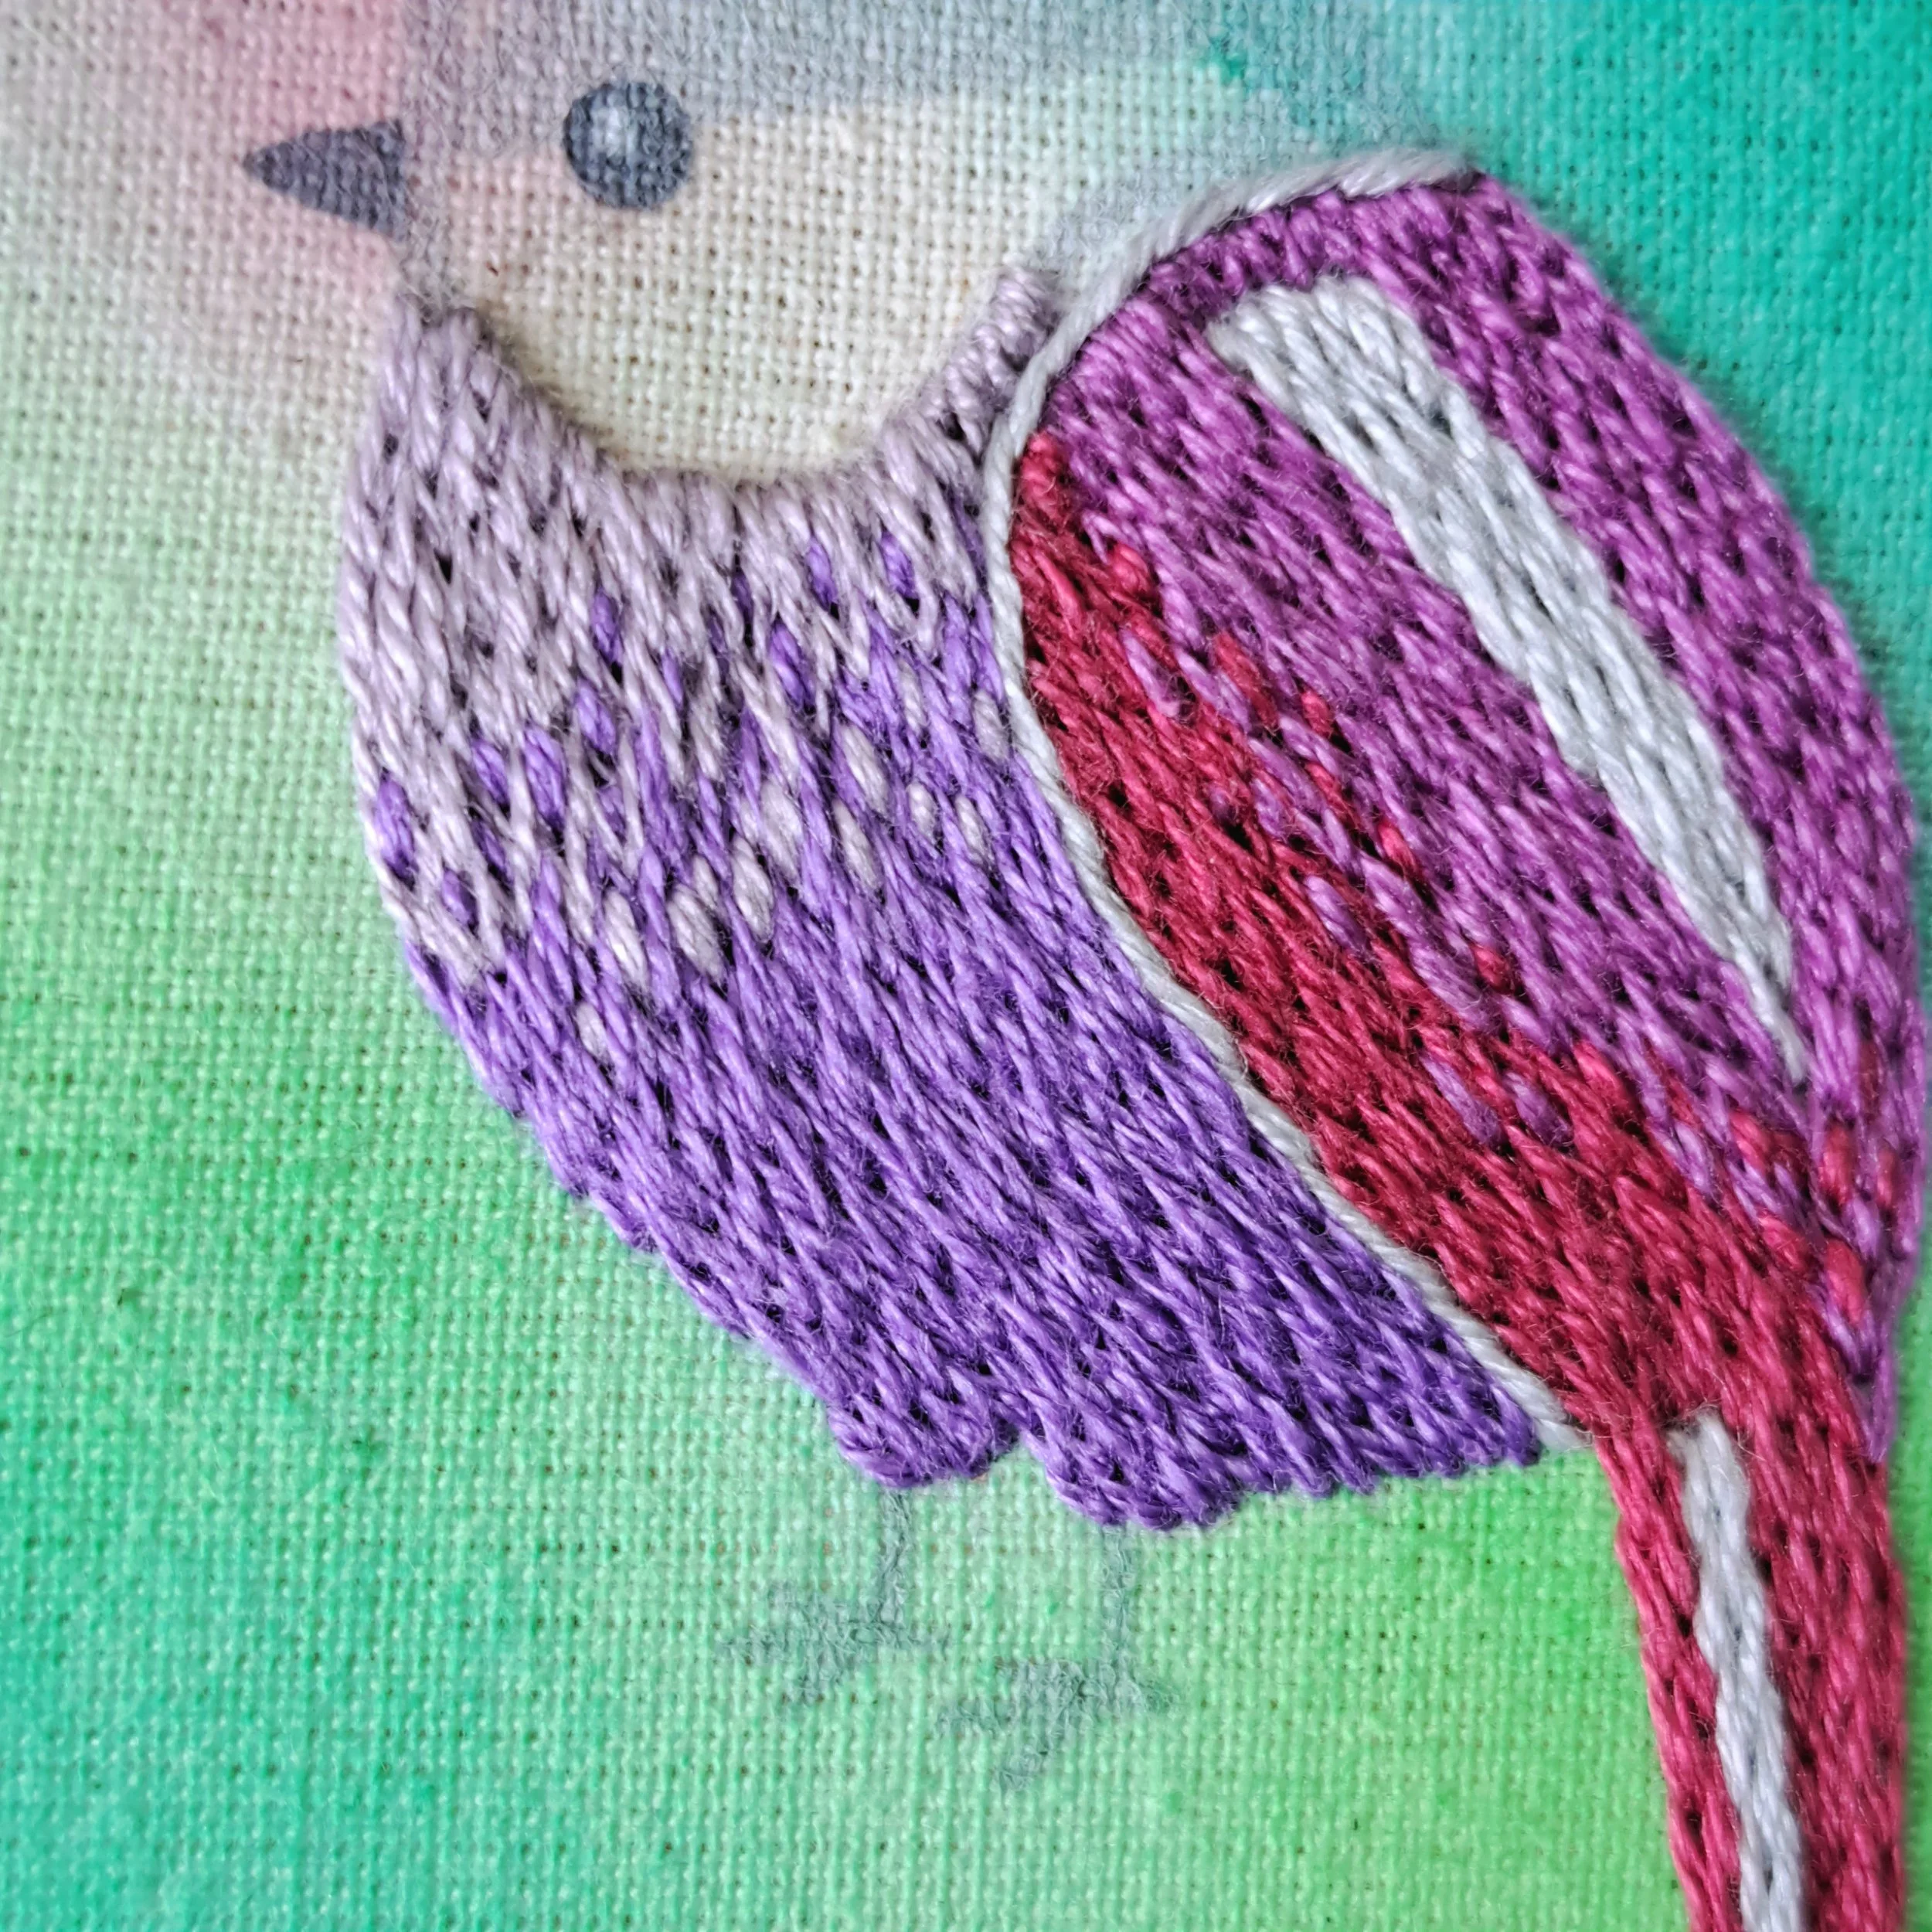
I started stitching at the bottom of the birds belly with Anchor 110. I changed colour to Anchor 870 in the same way as the wing and followed the curve of the bird with my stitches.
Add as many stitches as you like over the colour change line to blend these colours in.
I stitched straight over the chest markings rather than stitching around them all. I added these over top of these split stitches later on.
3.6 The cheek
Stitch – Satin Stitch
Thread colours – Anchor 398
Number of strands – 3
Needle size – Middle Sized
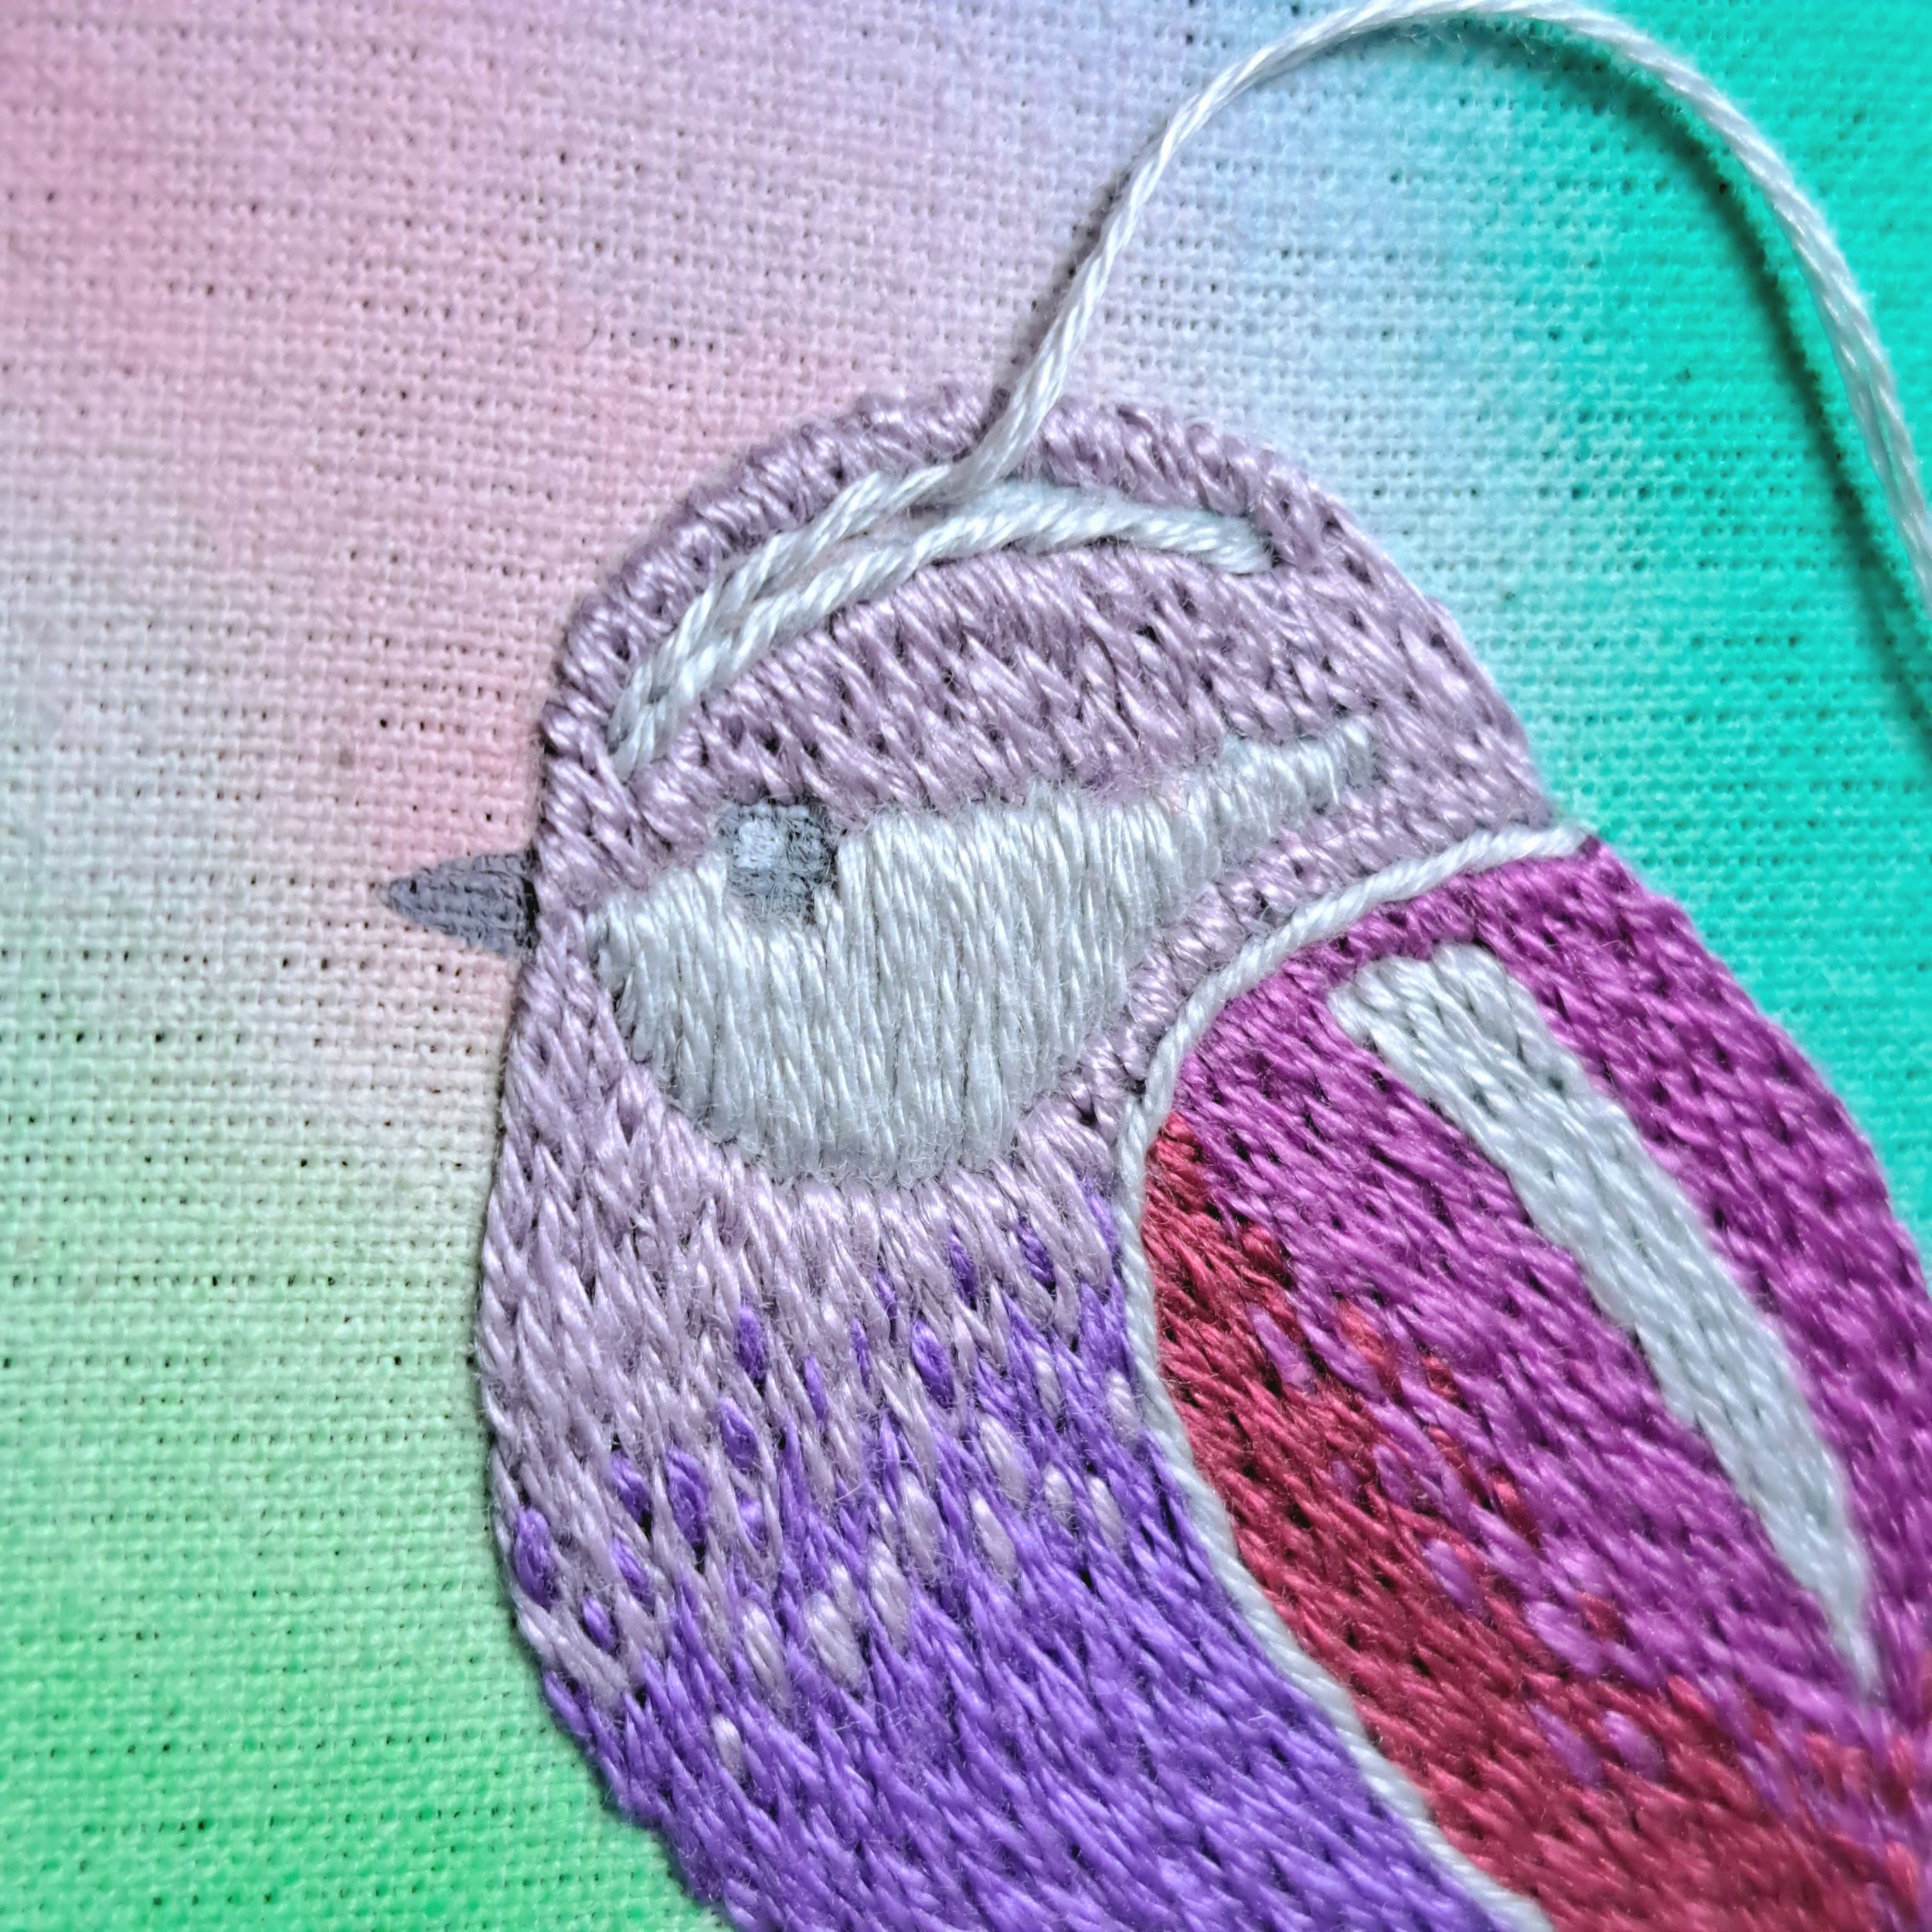
Stitch vertical satin stitches with Anchor 398.
3.7 Head marking
Stitch – Stem Stitch
Thread colours – Anchor 398
Number of strands – 3
Needle size – Middle Sized
I stitched these in the same way as the wing marking so that they make a nice point at the tip.
3.8 The eye
Stitch – Satin Stitch and one very small straight stitch for the pupil
Thread colours – Anchor 401
Number of strands – 3
Needle size – Middle Sized
I first filled in the eye with horizontal satin stitches using Anchor 401. Then I added one small straight stitch vertically using Anchor 398, this straight stitch saddles one of the underlying satin stitches.
3.9 The beak
Stitch – Satin Stitch
Thread colour – Anchor 401
Number of strands – 3
Needle size – Middle Sized
I stitched these satin stitches vertically.
3.10 The chest markings
Stitch – Straight Stitch
Thread colour – Anchor 398
Number of strands – 3
Needle size – Middle Sized
I added these small straight stitches following the chest curve over the top of the split stitches. I didn’t add them in the exact same place as the original print, but free styled their placement and added as many as I liked.

3.11 The legs
Stitch – Straight Stitch
Thread colour – Anchor 401
Number of strands – 3
Needle size – Middle Sized
I made 4 straight stitches per leg.
And the bird is finished! Buuut even though I had original planned to keep the background unstitched…..I couldn’t help but add some feathers around him.
4. Finishing touches
Stitch – Fly Stitch
Thread colours – Anchor 69, 92 & 110
Number of strands – 1
Needle size – Small Sized

I added these feathers in random places and directions. You may find it easier to draw these on with an erasable fabric pen to stitch over, but I enjoyed free stitching these feathers.
I started with a straight stitch at the tip of the feather, then added 4 fly stitches in a row to form the feather.

5. Display your Finished Embroidery
You can frame your finished piece in the very hoop you stitched it in. If your project isn’t central in your hoop, now is the time to take it out and reposition it.
Trim away excess fabric from the edges of the hoop, leaving a ring about 4cm all the way around. Stitch a running stitch about 1cm in from the fabric edge, leaving an unknotted tail at the start and finish. Pull these two tails to gather in the fabric. Tie a knot to hold in place.
Take a look at this little video to see how I do this bit……
If you’re gifting your work, you may like to glue or stitch a felt circle onto the back of your hoop.
There are many creative ways to display your embroidery hoops that can add a unique and personal touch to your home.
One of the most common ways, and the way that I love to display my hoops, is to hang them on a wall. You can create a gallery wall by hanging several hoops in a group or arrange them in a pattern. To hang the hoops, you can use a nail, picture hook or adhesive hook.
Step back and admire your beautiful work!
I hope you loved this one. Check out my other embroidery blog posts, some of them have links to live stitching videos that you can stitch along with. I also currently have 12 other embroidery square designs in my shop that you’ll love relaxing and getting creative stitching.
Enjoy your stitching!
Until next time,
Liz x