February Stitch Along - The Lighthouse
Hello again! I’ve just finished off my February stitching so thought this was the perfect time to write the blog to go along with it. Although these stitch along blogs are going to be more like little recap guides for those of you wanting something to refer to quickly if you fancied stitching your own embroidery squares.
So, it was my lighthouse design that was voted for to be February’s stitching design. And as February is National Embroidery Month I thought it’d be fun to try the weekly stitching videos live on Instagram. The lives are such a great way of interacting with you all and giving you the chance to ask me any questions you’ve got that I can answer there and then. Although it is super tricky to stitch through a camera live and keep an eye on the chat box at the same time….but I think the value that you get from me being live is completely worth it.
Just a quick note: Since stitching this lighthouse, I’ve updated my embroidery panels. While the new panels are no longer hand-printed, the lighthouse design remains similar (just the outline). You can still use this blog as a guide for stitching it, and the links now direct to the updated version of the design.

I print my designs in grey so that you can colour them in in your favourite colours. Since stitching my lighthouse, I’ve tweaked this design slightly. But you can still follow along with this blog and stitch it in the same way.
Now that my lighthouse is all coloured in, I wanted to write a little recap of February’s stitching. I’ve noted which stitches I used, the thread colours, number of strands and which needle I used. But don’t forget the beauty of my embroidery squares is that you can colour them in using which ever stitches and threads you like! I’ve also added the links to my Instagram live videos, so you can give them a watch if you need to, even if you don’t have an Instagram account.
If you fancy giving it a go, click this button to get your lighthouse embroidery square…….
Note: This post is based on my original hand-printed panels, but the new versions still feature a similar lighthouse outline!
I used 6 different thread colours on my lighthouse: Anchor 1005 (red), Anchor 397 (off white), DMC 169 (grey), Anchor 1066 (dark blue), DMC 597 (light blue) and DMC 728 (yellow). But please do have fun using as many colours as you like!
Week 1 – video link
1) To get started, I stitched the main lighthouse first. I went with a classic alternating red and white.
Stitch – Brick stitch
Thread colours – Anchor 1005 (red) and Anchor 397 (off white)
Number of strands – 3
Needle size – Middle sized needle from my needle pack (these are available in my shop here)
I found it super helpful to draw guidelines onto my lighthouse. This made it soo much easier to keep the brick pattern going nice and evenly all the way up my lighthouse.
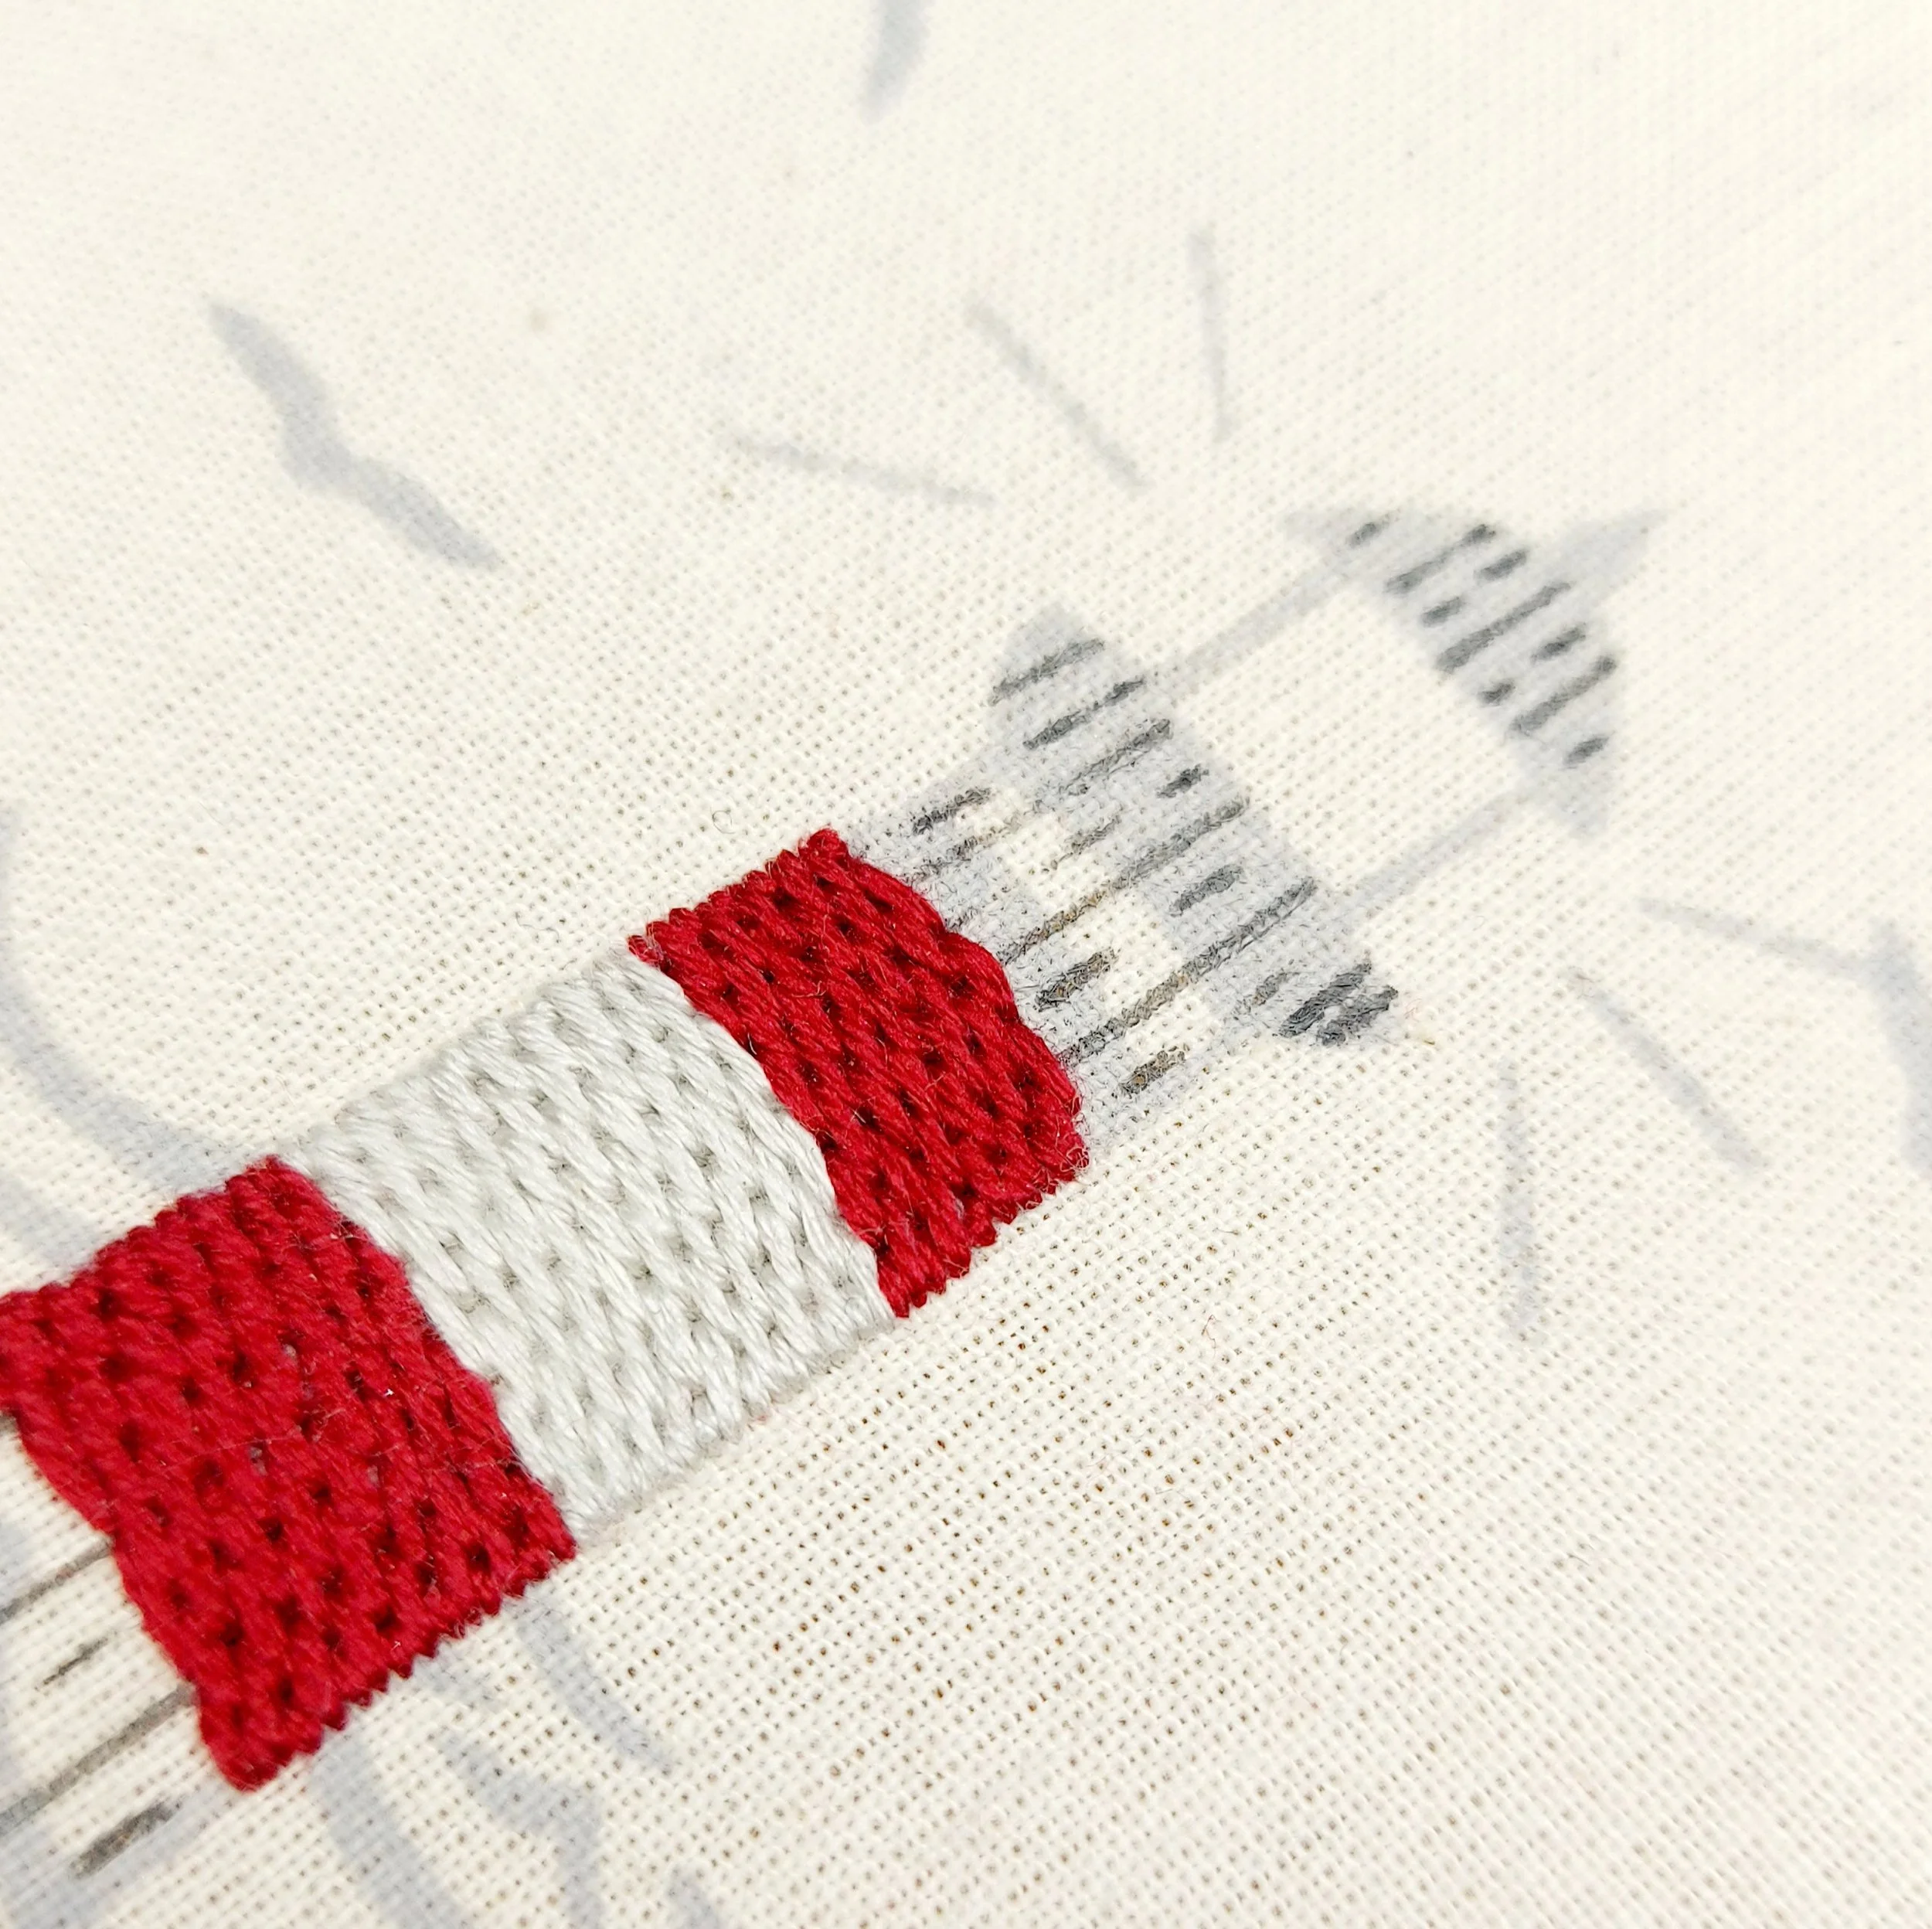
I drew the grid lines on with a fabric pen and they really helped to keep my brick pattern neat.
Week 2 – video link
2) The waves
Stitch – Stem stitch
Thread colours – Anchor 1066 (dark blue) and DMC 597 (light blue)
Number of strands – 3 (made up of 2 strands of the darker blue and 1 strand of the lighter blue)
Needle size – Middle sized needle
I love the effect of mixing the 2 blues for the waves, its just the sort of detail that I like to play around with.

I love the look of mixing the two blue colours but a variegated thread could also be a fun option here.
Week 3 – video link
3) The lantern
Stitch – Satin stitch stitched on the diagonal
Thread colour – Anchor 397 (off white)
Number of strands – 3
Needle size – Middle sized needle
4) The lantern sides
Stitch – Split stitch
Thread colour – DMC 169 (grey)
Number of strands – 5
Needle size – Large sized needle
5) The door
Stitch – Long and short Split stitch
Thread colour – DMC 169 (grey)
Number of strands – 2
Needle size – Small sized needle
6) The door knob
Stitch – French knot with 1 wrap
Thread colour – DMC 728 (yellow)
Number of strands – 2
Needle size – Small sized needle

The satin stitch on the diagonal is a great effect for the lantern glass.
Week 4 – Video link
7) The birds
Stitch – Split stitch
Thread colours – Anchor 397 (off white) and DMC 169 (grey)
Number of strands – 2
Needle size – Small sized needle
I used the lighter thread colour on the underneath of the birds and the grey for the tops. I had fun giving each bird different amounts of the grey and off white, so they all look different.

I gave each of my birds a different look by altering the amounts of grey and off white on each one.
8) The lights
Stitch – Bullion stitch
Thread colour – DMC 728 (yellow)
Number of strands – 3
Needle size – Middle sized needle
9) The lightning rod
Stitch – Pistil Stitch with 3 wraps
Thread colour – Anchor 1005 (red)
Number of strands – 3
Needle size – Middle sized needle

The bullion stitch really gives the lights an extra pop.
And that’s it! So, if you fancy giving it a go, you can get your lighthouse embroidery square HERE.
You can buy the squares individually if you already have a stitching stash to use, but I also stock threads, needles and hoops if you need them. And don’t forget the lighthouse stitching video series is available on my Instagram and use #bluebellloveembroidery to show off your beautiful work - I really would love to see it!

My finished lighthouse embroidery hoop.
My wildflower design has been voted for the March Stitch Along. I’m really excited to get started on this one and play around with the flower colours. If you fancy joining in, buy your ‘Sunny Meadows’ embroidery square from my shop and follow my instagram to join my lives.
See you there!
Happy Stitching :)
Liz x