How to Stitch Your Hedgehog and Mushroom Embroidery Panel: A Step-by-Step Guide
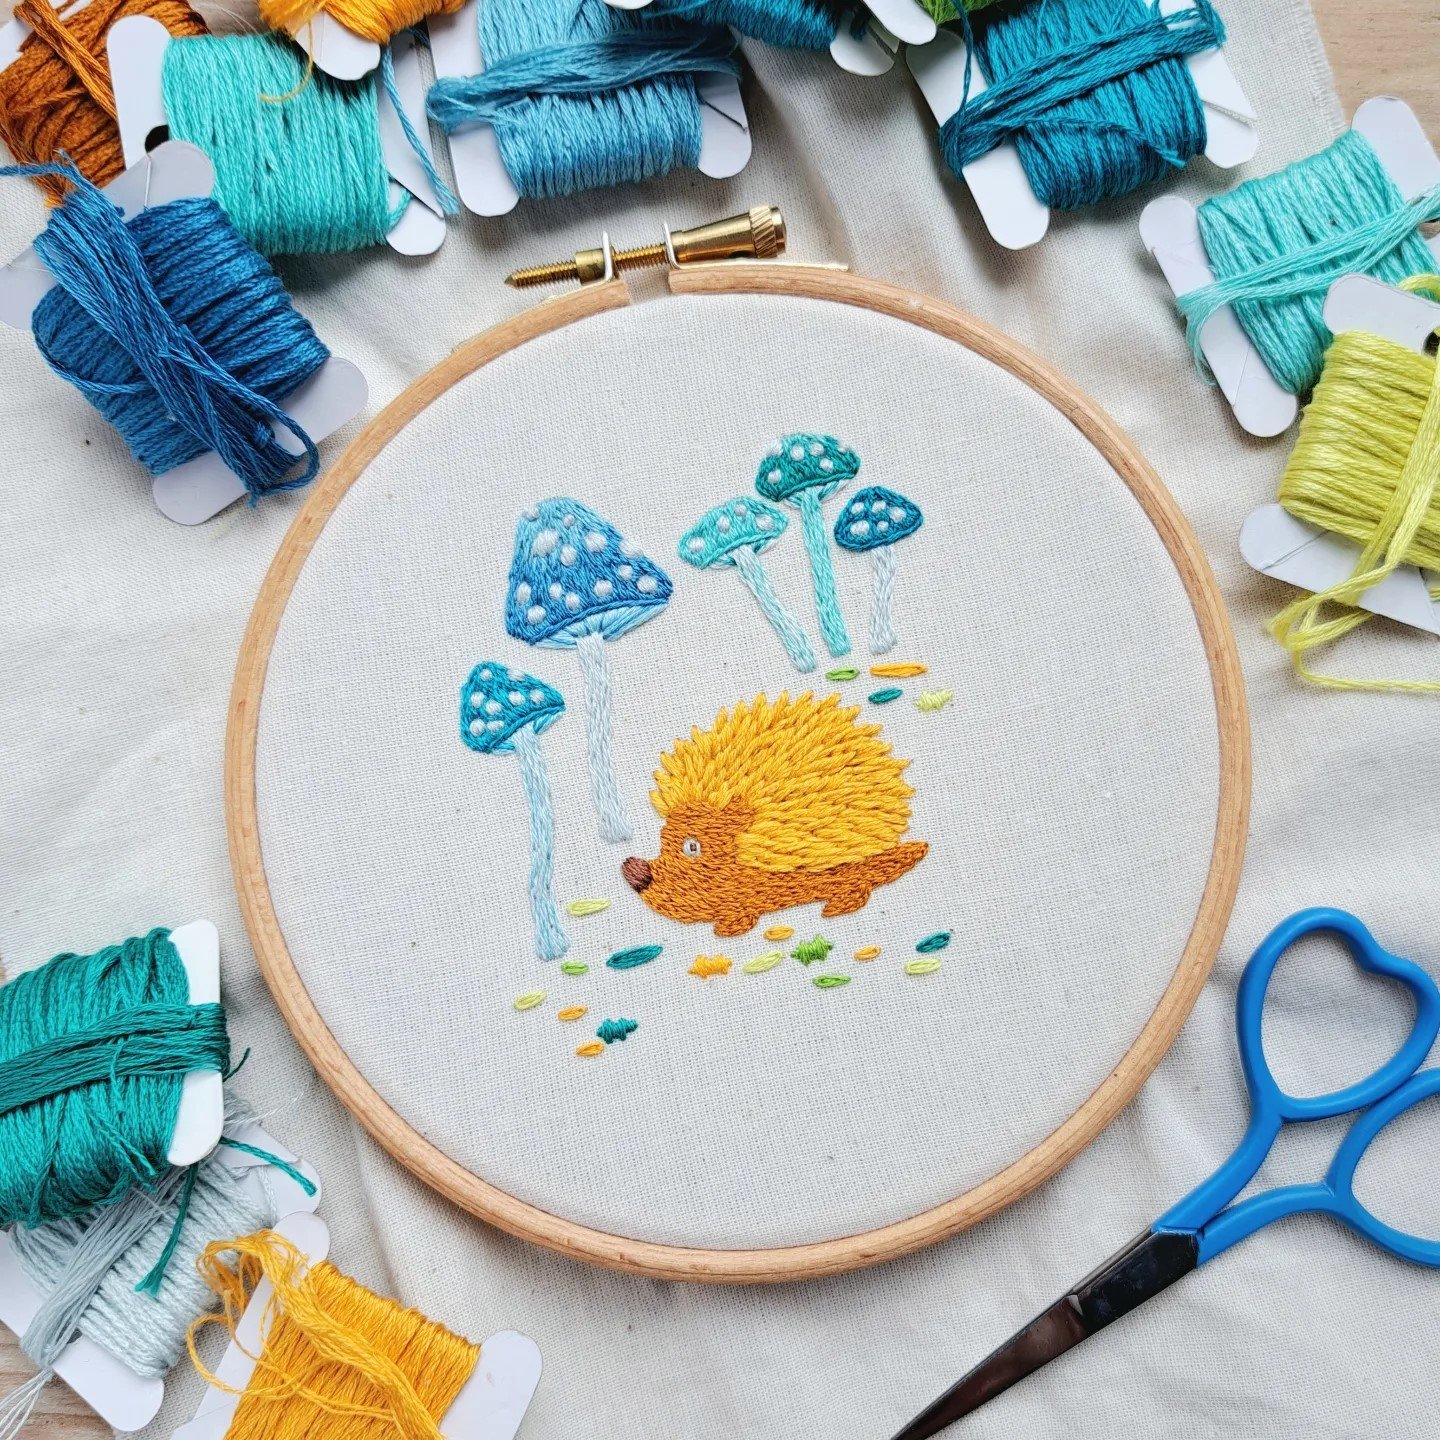
When it came to choosing colours for this mushroom embroidery, I just couldn’t settle on one! Instead of going with the classic red (which I agree would be cute), I found myself exploring so many beautiful types of mushrooms online - some that looked like they belonged on an alien planet. I was especially drawn to the vibrant blues and greens, so I pulled out a bunch of shades from my thread stash that I love and decided to use them all.
Now that my hedgehog and mushroom panel is finished, I’m sharing how I stitched it - from the threads and stitch types to the needle size and techniques. Follow along with this step-by-step guide, but feel free to switch things up and make the design your own!
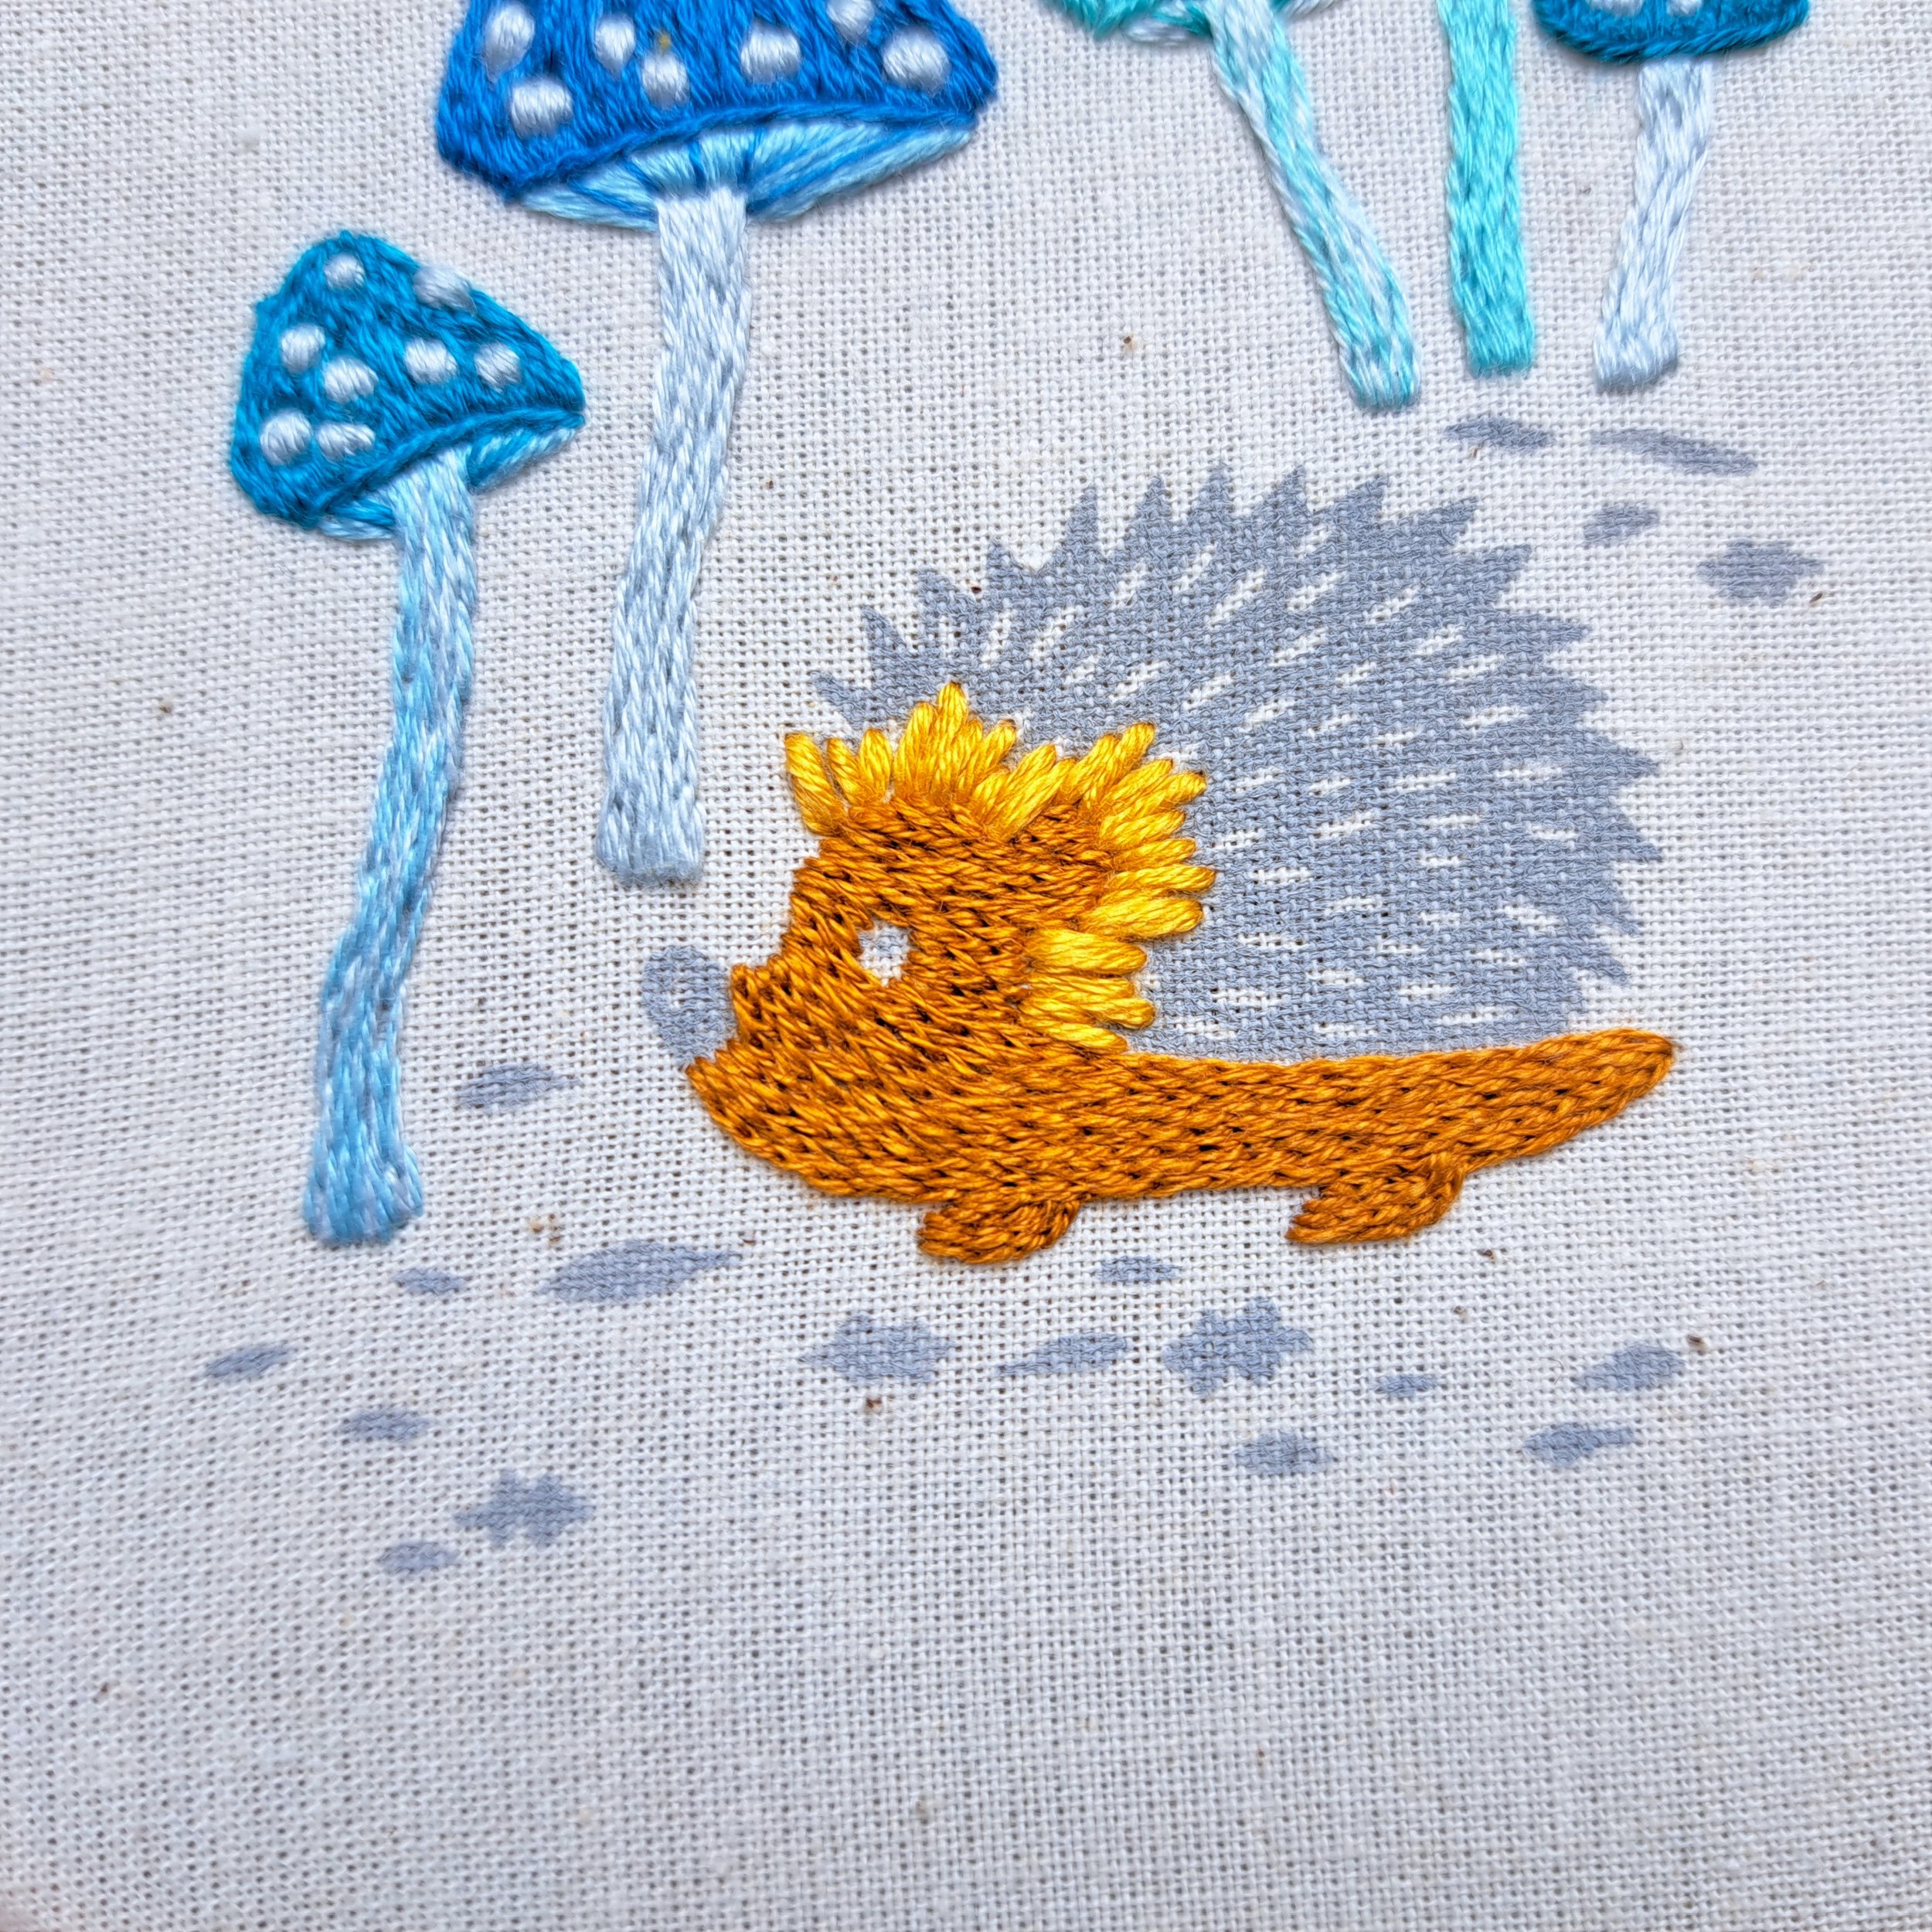
Just a quick note: Since stitching this hedgehog, I’ve updated my embroidery panels. While the new panels are no longer hand-printed, the hedgehog and mushrooms remains the same (just the outlines). You can still use this blog as a guide for stitching it, and the links now direct to the updated version of the design.
What materials you need
A hand printed embroidery square, an embroidery hoop, needles, threads and scissors. I’ll delve into each of these below……
One of my hand printed embroidery squares
Note: This post is based on my original hand-printed panels, but the new versions still feature the same hedgehog outline!
To start, you’re going to need one of my hedgehog embroidery squares. They are hand printed onto natural calico squares ready for you to colour in using whichever stitches and thread colours you like! You can get your hedgehog embroidery square here………
An Embroidery Hoop
I stitched my hedgehog in a 5” hoop, this sized hoop fits really well with all of my embroidery squares.
Embroidery Needles
Embroidery needles come in different sizes, and using the right needle throughout your project can make a big difference in how neat your work looks. The larger the needle, the bigger the hole it creates in your fabric. If you use a large needle with only a few strands of thread, your stitches might shift around. On the other hand, if you use a small needle but try to stitch with 6 strands, you’ll struggle to pull the thread through smoothly.
In my shop, I sell needle packs that include 6 needles in three different sizes: a large needle for stitching with 6 strands, two medium needles for 3 or 4 strands, and three smaller needles for 1 or 2 strands. Throughout this tutorial, I'll refer to these needle sizes, so you can easily follow along.
You can purchase these needle packs here...
Threads
For this project, I used Anchor 6-stranded cotton threads, which are my go-to choice. They’re high quality, and I love the wide range of colours they offer.
I started building the colour palette by selecting shades for the mushrooms, then chose complementary colours for the hedgehog and leaves. In total, I used 15 different colours -quite a lot for such a small piece (I just couldn’t resist!). If you prefer a simpler palette, you could scale it back by stitching the leaves in one colour and the mushrooms in another.
These are the 15 colours I picked out:
Anchor 530 – Blue Green
Anchor 168 – Light Surf Blue
Anchor 169 - Medium Surf Blue
Anchor 1575 – Blue Green
Anchor 188 – Medium Dark Sea Green
Anchor 186 – Medium light Sea Green
Anchor 185 - Light Sea Green
Anchor 167 – Very Light Surf Blue
Anchor 274 – Light Blue Mist
Anchor 308 – Medium Dark Topaz
Anchor 306 - Medium Light Topaz
Anchor 358 - Coffee
Anchor 303 - Medium Citrus
Anchor 255 - Medium Light Parrot Green
Anchor 278 – Light Olive Green
Scissors
Any scissors will work, but sharp-pointed embroidery scissors are best for trimming threads.
2. The stitches I used
Long and Short Stitch
Satin Stitch
Stem Stitch
Straight Stitch
Split Stitch
Padded Satin Stitch
Couch Stitch
Lazy Daisy
But just remember, these are the stitches that I’ve used but you absolutely don’t need use the same stitches for your lovely Hedgehog. Playing with different stitches can give your embroidery a completely different look.
3. Time to start stitching
Place your embroidery square into the hoop, making sure the fabric is nice and taut. I always aim for a drum-like tension in the hoop, as it helps keep stitches neat and prevents wrinkling. To achieve this, pull the edges of the fabric outside the hoop to smooth out any bumps. Once it’s even, tighten the screw mechanism until it’s secure. Then, give the fabric another gentle pull around the edges to increase the tension a bit more. Your fabric should now be tight, just like a drum, and ready for stitching.
Remember to check your fabric’s tension as you work, since it may loosen as you stitch.
4. Step-by-Step Stitching Guide
The Mushroom Caps
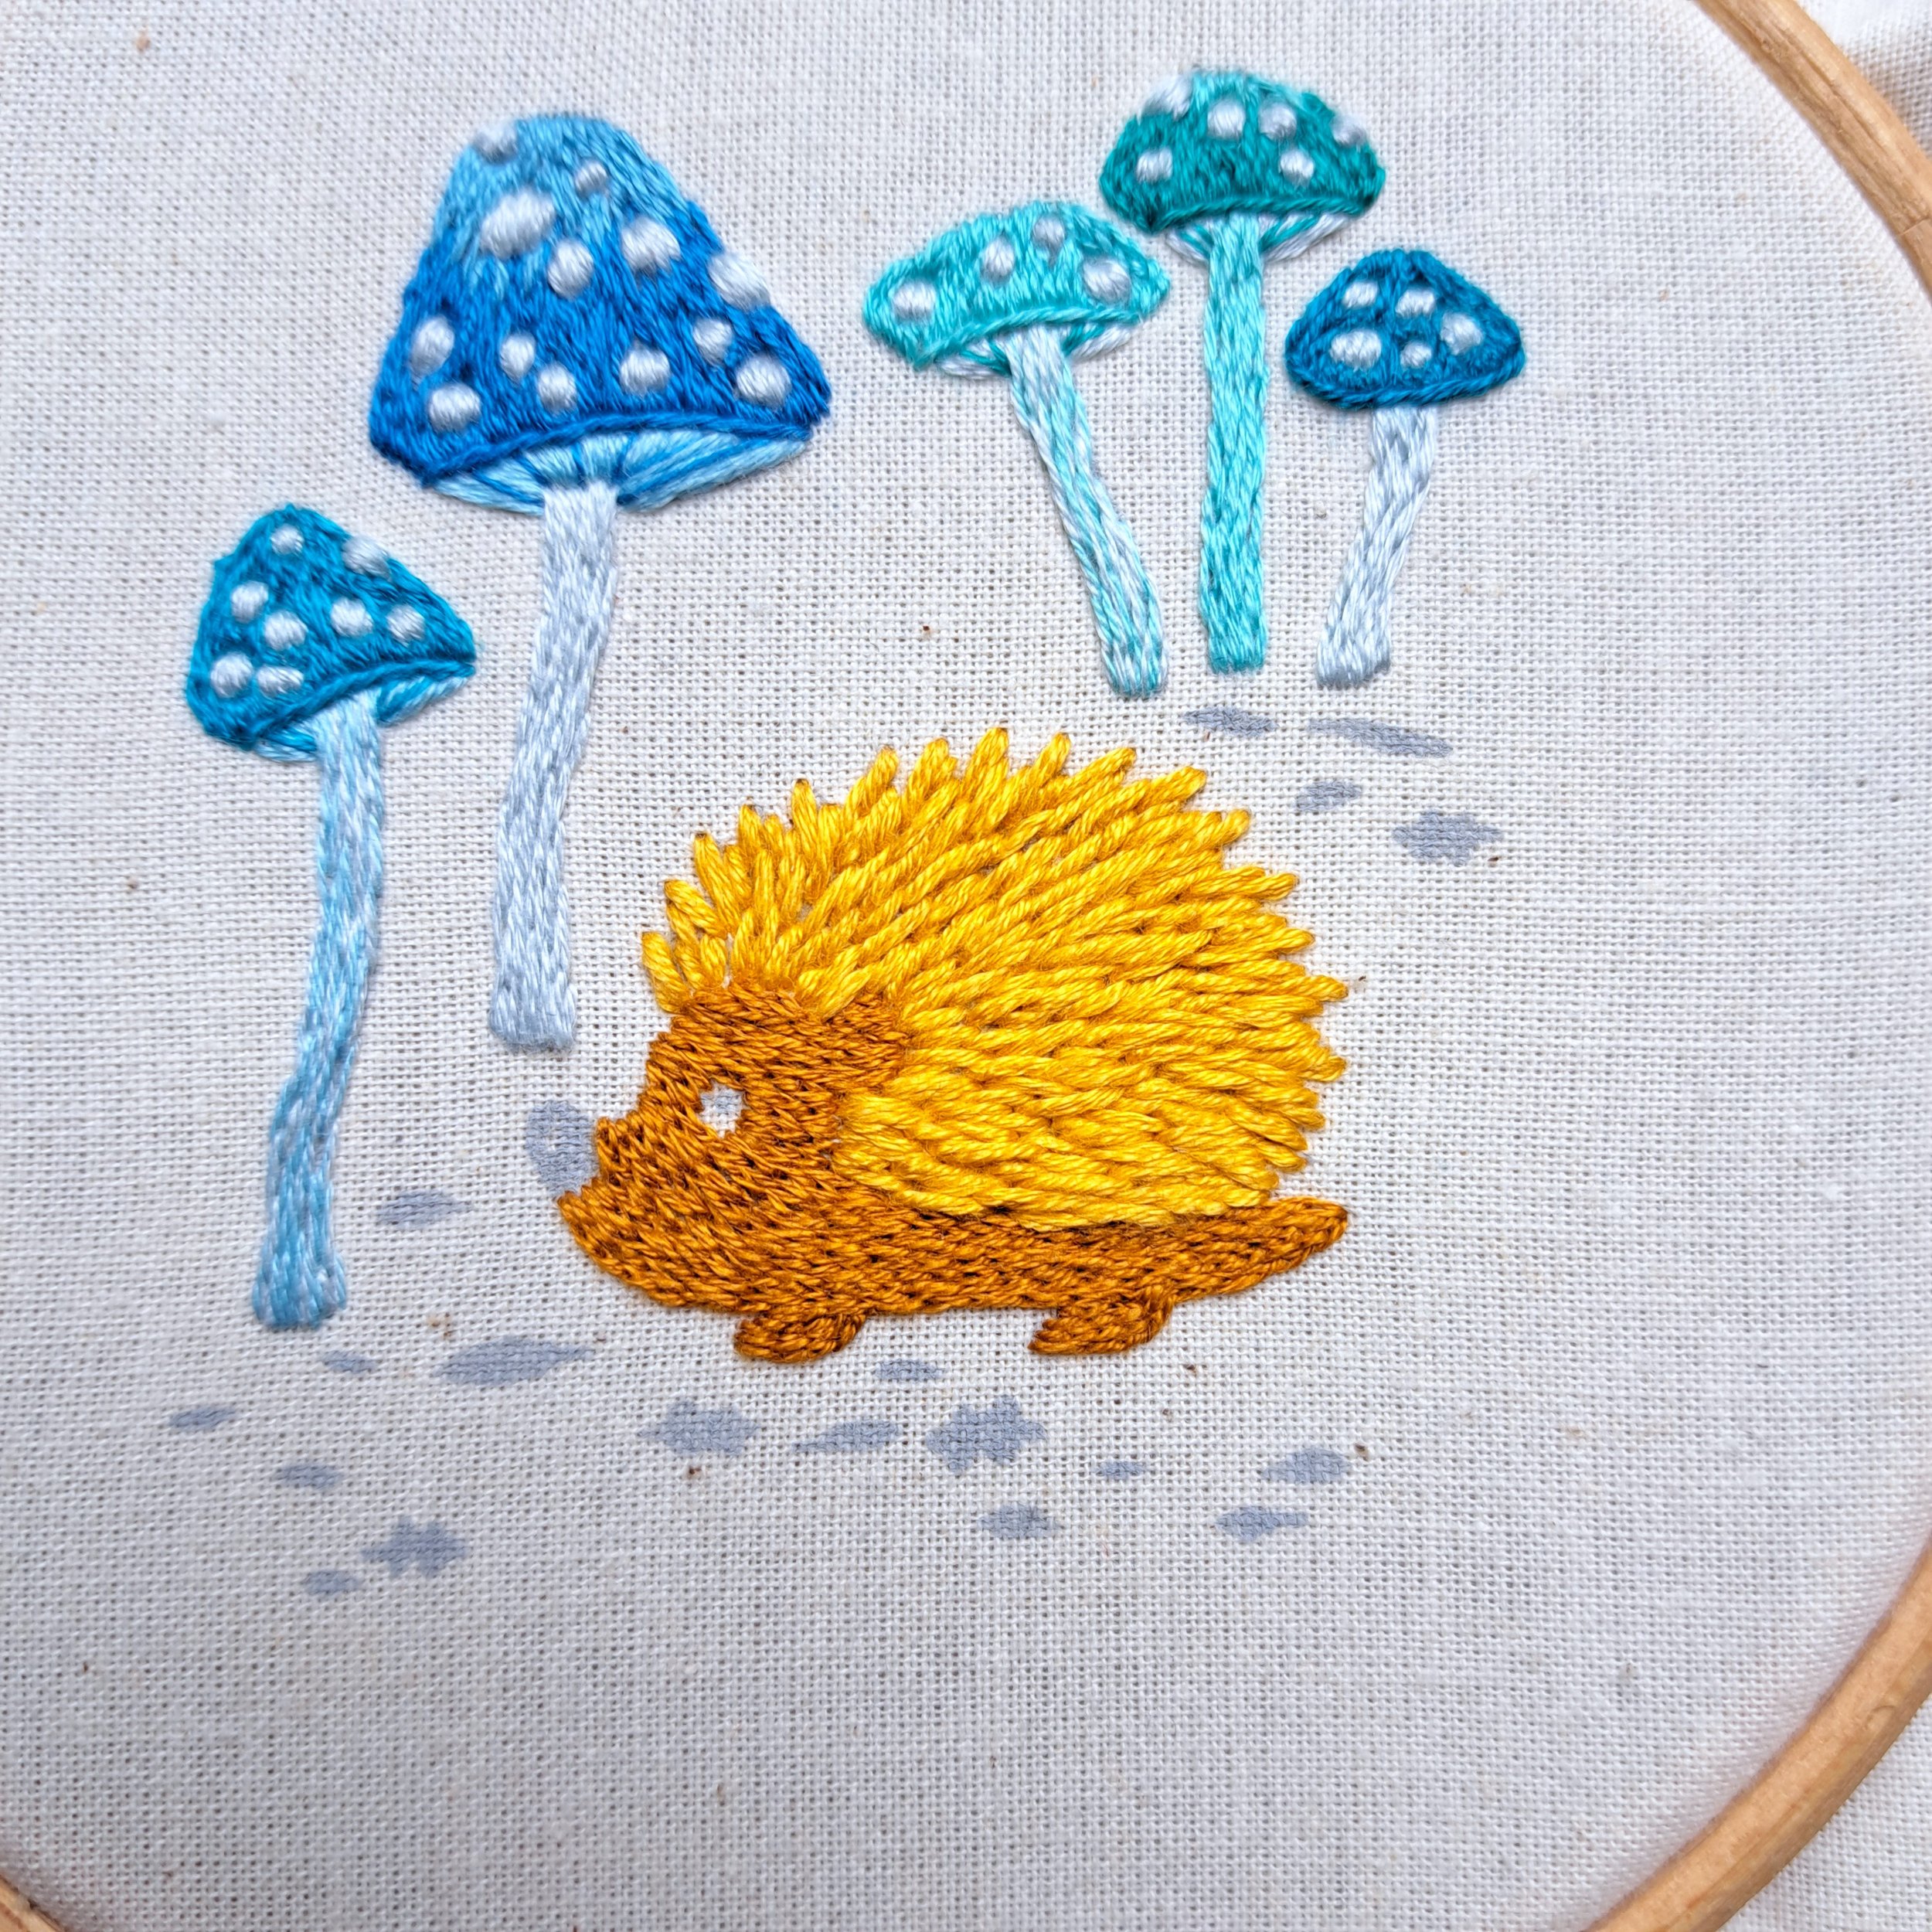
I stitched each mushroom cap in a different colour, and for a couple of them, I blended two colours together in the middle for a nice, gradual transition. When you’re stitching, just angle your stitches toward the top of the caps to follow their natural shape - it gives them a more realistic look.
A quick tip: Start each stitch close to where you finished the last one. This helps reduce the amount of thread on the back of your embroidery and makes stitching the next section easier
Stitch – Long and Short Stitch
Thread colour – Anchor 530, 169, 168, 186, 188 & 1575
Number of strands – 2
Needle size – Small
The Mushroom Scales
I stitched all the scales using vertical satin stitches. For some of the larger scales, I doubled up the stitches to create a padded effect. On the scales closer to the tops of the caps, I angled the stitches the same way as I did for the mushroom caps.
A little tip: Gently brush your needle over the top of the caps to help neaten and smooth out the stitches.
Stitch – Satin Stitch
Thread colour – Anchor 274
Number of strands – 6
Needle size – Large
The Stalks, Underneath, Cap edge and the Gills
I stitched the mushroom stalks, the underside of the caps, the cap edges, and the gills in the same way, but used different colours for each. Mixing up the colours gives the mushrooms more character and adds variety to the embroidery.
🍄 Mushroom 1 -
Stalk:
Stitch – Long and Short Stitch
Thread colour – 1 strand of Anchor 167 combined with 1 strand of Anchor 274
Number of strands – 2
Needle size – Small
Underneath:
Stitch – Angled Satin Stitch
Thread colour – Anchor 167
Number of strands – 2
Needle size – Small
Gills:
Stitch – Straight Stitch
Thread colour – Anchor 530
Number of strands – 1
Needle size – Small
Cap Edge:
Stitch – Stem Stitch
Thread colour – Anchor 530
Number of strands – 2
Needle size – Small
🍄 Mushroom 2 -
Stalk:
Stitch – Long and Short Stitch
Thread colour – Anchor 274
Number of strands – 2
Needle size – Small
Underneath:
Stitch – Angled Satin Stitch
Thread colour – Anchor 167
Number of strands – 2
Needle size – Small
Gills:
Stitch – Straight Stitch
Thread colour – Anchor 169
Number of strands – 1
Needle size – Small
Cap Edge:
Stitch – Stem Stitch
Thread colour – Anchor 169
Number of strands – 2
Needle size – Small
🍄 Mushroom 3 -
Stalk:
Stitch – Long and Short Stitch
Thread colour – 1 strand of Anchor 274 combined with 1 strand of Anchor 185
Number of strands – 2
Needle size – Small
Underneath:
Stitch – Angled Satin Stitch
Thread colour – Anchor 274
Number of strands – 2
Needle size – Small
Gills:
Stitch – Straight Stitch
Thread colour – Anchor 188
Number of strands – 1
Needle size – Small
Cap Edge:
Stitch – Stem Stitch
Thread colour – Anchor 186
Number of strands – 2
Needle size – Small
🍄 Mushroom 4 -
Stalk:
Stitch – Long and Short Stitch
Thread colour – Anchor 185
Number of strands – 2
Needle size – Small
Underneath:
Stitch – Angled Satin Stitch
Thread colour – Anchor 274
Number of strands – 2
Needle size – Small
Gills:
Stitch – Straight Stitch
Thread colour – Anchor 188
Number of strands – 1
Needle size – Small
Cap Edge:
Stitch – Stem Stitch
Thread colour – Anchor 188
Number of strands – 2
Needle size – Small
🍄 Mushroom 5 -
Stalk:
Stitch – Long and Short Stitch
Thread colour – Anchor 274
Number of strands – 2
Needle size – Small
Cap Edge:
Stitch – Stem Stitch
Thread colour – Anchor 1575
Number of strands – 2
Needle size – Small
Hedgehog Feet, Face and Tail
I used split stitch for the hedgehog’s tail, feet, and face. I stitched in rows, starting from the tail and working my way toward the face. To give it a more natural look, I curved the stitch rows to follow the shape of the body.
Stitch – Split Stitch
Thread colour – Anchor 308
Number of strands – 2
Needle size – Small
Hedgehog Spikes
I stitched the hedgehog spikes using short, straight stitches, angling them outward to create a spiky effect.
A quick tip: Start each stitch close to where you finished the last one. This reduces the amount of thread on the back of your embroidery and makes the stitching process easier.
Stitch – Straight Stitch
Thread colour – Anchor 306
Number of strands – 6
Needle size – Large
Hedgehog Nose
To create a cute, rounded nose, I used a padded satin stitch. You can use any stitch to create the padding for the satin stitches on top, but I chose to stitch two small lazy daisies for my padding. Lazy daisies add a nice bit of height, which helps create a more defined and raised satin stitch.
Stitch – Padded Satin Stitch
Thread colour – Anchor 358
Number of strands – 3
Needle size – Middle
Hedgehog Eye
To create the eyes, stitch about four vertical satin stitches for each one. Keep the stitches close together to form a neat, solid shape.
Stitch – Vertical Satin Stitch
Thread colour – Anchor 274
Number of strands – 3
Needle size – Middle
Eye Pupil
To complete the hedgehog, I stitched two small couching stitches over the satin stitches to create the pupil.
Stitch – Couch Stitch
Thread colour – Anchor 358
Number of strands – 2
Needle size – Small
The Leaves
For the oak leaves, I used vertical satin stitches, while for the longer, thinner beech leaves, I opted for a lazy daisy stitch with a straight stitch in the middle. I introduced three new colours for the leaves, along with two colours we've used earlier in the project. Feel free to mix and match the colours randomly to create a fun, speckled leaf pattern!
Stitch – Oak Leaves: Vertical Satin Stitch
Beech Leaves: Lazy daisy filled with a single straight stitch
Thread colour – Anchor 255, 303, 278, 306 & 188
Number of strands – 2
Needle size – Small
And that’s it! This cute woodland scene is finished!
5. Finishing and Displaying your Embroidery
You can frame your finished embroidery in the very hoop you used for stitching, which is one of my favourite ways to display my embroidery projects. To do this, trim away the excess fabric from the edges of the hoop, leaving about a 4 cm ring all the way around. Next, stitch a running stitch about 1 cm in from the fabric edge, leaving unknotted tails at the start and finish. Gently pull these tails to gather the fabric and tie a knot to hold it in place.
The best part about this method is that it’s not permanent! If you decide later to add to your embroidery, you can easily remove the running stitches and continue working until you’re satisfied.
For this particular project, I used one of my banner kits to turn my embroidered hedgehog into a cute banner that can be hung anywhere in my home. These kits are designed to pair perfectly with any of my embroidery squares.
Step back and admire your beautiful work!
I hope you enjoyed this project! Be sure to check out my other embroidery blog posts, some of which include links to live stitching videos so you can stitch along with me. I also have 12 other embroidery square designs available in my shop that I think you'll love for some relaxing creativity.
You can find them all here……….
And don’t forget to tag me on social media when you show off your beautiful work—I’d love to see it!
If you enjoyed this blog and would like to support my work, feel free to visit my Ko-fi and leave a tip - every little bit helps keep the creativity flowing! 🌸
Enjoy your stitching!
Until next time,
Liz x


